Welcome back to the "How to Make a Quilt" series! You can find all the previous posts in the series here.
Now that we have cut our fabric, we can now start piecing our blocks!
First, let's go over 1/4" seams:
If you don't have a 1/4" foot, then you can still quilt. Most sewing machine's allow you to move your needle to the left or to the right a bit. So move your needle over until you have a 1/4" seam--or close to it. The most important thing is to be consistent in your seams. Sew your seams all the same and you will be just fine, but if you sew one seam wide and another one way narrow, you will have a big problem matching your points up.
We are first going to make the 9-patch. This is a really fun block, and really easy to put together.
You are going to make two different strip sets. Basically what that means is that we are piecing together strips of fabric. This is called "strip" piecing and it is a really great time saving technique! Once you learn how to strip piece--you will use this technique quite a bit in the future when making different quilts.
So we are going to piece together two different strip sets:
white/red/white
red/white/red
For the baby size quilt you will make:
3 -- white/red/white strip sets
6 -- red --white--red strip sets
For the lap size quilt you will make:
6 -- white/ red /white strip sets
12 -- red /white/ red strip sets
Let's start with the red/white/red version:
You will place a red strip on top of the white strip--so right sides of the fabric are facing together. You will then sew a 1/4" seam straight down the strip.
Now that you have one side attached, you will attach the other red strip. By placing it on top of the white fabric--right sides together and sew a 1/4" seam.
Here is your sewn strip set:
Time to press--Press the seams towards the red for this strip set. This is important for later when we piece the blocks together.
You will create your white/red/white strip set the exact same way. But you will press the seams towards the middle.
Now you will line up your strip sets on your cutting mat. I don't like to layer them on top of each other--I don't feel like I get as accurate cuts this way. So what I do is I line them up on my mat like in the picture below. Line the bottom edge of each set on one of the lines on your mat so it is straight. You will first trim the edges:
Now we are going to cut them into 2.5" strips. Line up your ruler so that you are measuring a 2.5" and then cut:
Keep cutting 2.5" sections out of your strip set. You will get 7 units per set:
For the baby size quilt you are going to need:
36 red/white/red units
18 white/red/white units
36 red/white/red units
18 white/red/white units
For the lap size quilt you are going to need:
80 red/white/ red units
40 white/red/white units
80 red/white/ red units
40 white/red/white units
You will want to mix and match all your strips once you have them all cut out so that your blocks are nice and scrappy! Or maybe you want them all the same, that will be fine too--but mine are all mixed up and have a very scrappy look to them.
So you will start with three of these sets. You will ALWAYS put them in this order:
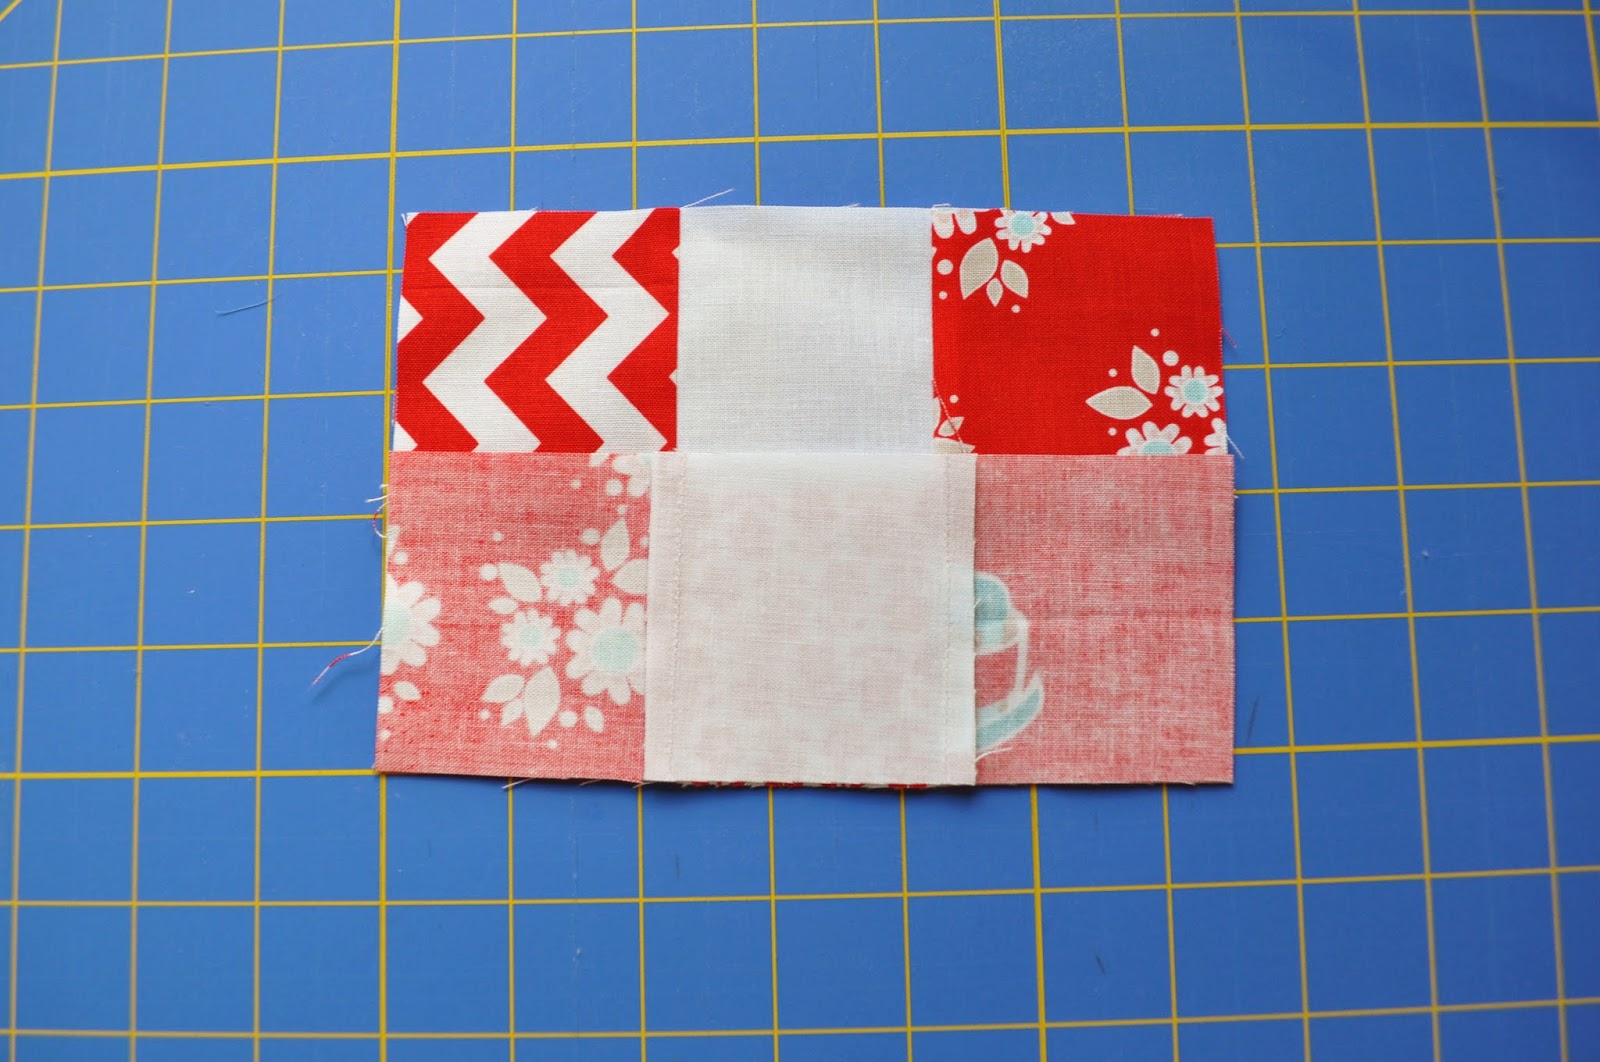
Lay the middle strip onto the top strip right sides together.
Nest your seams. This is why ironing your seams before were so important--so that when you put these blocks back together you have one seam going one way and the other going the opposite way. That way they nest really nicely! You can even pin on each seam so they don't move. You will then sew a 1/4" seam all the way down:
Look at those corners matching up so nicely! That is because I nested my seams together! I can't stress that enough--if you don't nest your seams then you aren't going to get your corners to match up as well.
Now lay your bottom section onto your sewn section right sides together and sew a 1/4" seam again.
You will then have your 9-patch block!
Here is how I pressed mine. I liked pressing my seams towards the middle on this block. You can do this whichever way you prefer.
That's it! You have successfully made a 9-patch!
You will need to make 18 of these blocks for the baby sized quilt.
You will need to make 40 of these for the lap sized quilt.
Next week we will go over the square in a square block and I will teach you how to "chain piece."
Talk to you soon,


2 comments:
Something I learned about 2 years ago was to set the seam. Once you sew the seam you need to set it by laying the iron down before you press it to one side. It helps the seam be crisper and hold better. All the fabric and thread become as one through the heat process. I have found that pressing has made my blocks look so much better.
Great tutorial and great pics! I love strip piecing. You can't have enough of these when you are learning:)
Post a Comment