
Welcome to the last installment of "How to Make a Quilt!" We are almost done! We have just finished quilting our quilt, so it's now time to bind.
So what is binding? Binding simply means we are finishing the raw edges of the quilt. There are several ways to do this. I recommend trying out a few methods, then deciding which one you prefer! Today I am going to show you how to machine bind your quilt.

I made a practice quilt sandwich to bind--so don't worry that it looks nothing like the quilt we have been working on! I was also testing out some free motion quilting--different circles and wavy designs!
Let's get started:
First you need to figure out how much binding you will need. To calculate that measurement you have to figure out the perimeter of your quilt. So the baby size quilt that I made is roughly 36" x 36 " That means all four sides of the quilt is 36"
So to find the perimeter we just add up all the sides : 36 + 36 + 36 + 36 = 144
So the perimeter of my quilt is 144" long. So we know that we need a binding that is roughly that long. We also have to take into account the mitered edges and also the bias seams that we will be doing. For each mitered corner add 2.5" and for each seam add another 2.5" this should give you plenty of binding to work with. (I originally posted 1" per seam and miter, but found out a great tip from a reader (Jane Brown) who suggested that you use the same measurement as your width of your binding strips.)
Let's add those all together:
144 + 10 (mitered corners) + 7.5 (per seams) = 161.5" continues binding.
Binding strips are cut in a variety of widths, but I prefer mine 2.5" x width of fabric. The width of fabric is usually between 42-44 inches. So I am going to say our width of fabric (WOF) is 42" to be on the safe side. If our fabric is 42" long then we need to take our binding calculation 152" and divide that by 42"
161.5/42 = 3.8
So we need to cut 4 strips of that are 2.5" x WOF.
First, take two strips and place them right sides together but notice that I placed them so they cross like this:

Sew a diagonal line from edge to edge:

Measure a 1/4" from the seam and cut off the excess:

Iron your seam open--to prevent bulk.

You will continue to sew together your strips using the same method until you have all your strips sewn together. Once they are all sewn together you will press them wrong sides together exactly in half:

Now we are ready to sew the binding onto the quilt. You will line up the raw edge of the binding to the raw edge of the quilt. Leave about 10-12 inches of binding before you start to sew. This is important so that we can join the two edges of our binding later.

This next part is all about preference. I prefer to sew my binding on using a bit larger than 1/4" seam. Some people do it exactly a 1/4" I like to do it a bit wider because when I stitch the front of the quilt, I feel like it all lines up better in the end. This is something that you will figure out over time what you prefer. For the sake of this tutorial, let's say sew your binging using a 1/4" seam:

When you come to the corner, stop when you get 1/4" from the edge:

Instead of going straight off the edge, I like to go off on an angle like this:

Turn your quilt, and then flip your binding up like this:

Now fold it back down so you create a folded edge like this:

Pin in place:

Now start sewing again, using that 1/4" seam. I would also backstitch here.

You will continue to sew all around your quilt and follow the same instructions for each corner you come to. When you are about ready to meet the two ends together, stop sewing so you have about 8" on your other end:

Over lap the edges and measure 2.5" and make a mark:

Cut on your mark:

Now you will join these two edges just like you did when we joined our strips before. Place them right sides together so they cross and then sew a diagonal line. It really helps to pin it in place so it doesn't shift while you sew it.

Trim the excess off like you did when we sewed our strips together and press the seam open. You will then fold the binding back and then finish sewing it to the quilt.

Now that your binding is sewn on you need to fold it over to the front of the quilt and hold it in place with pins or you can use these really awesome basting clips. (You can find them here if you'd like to buy some)
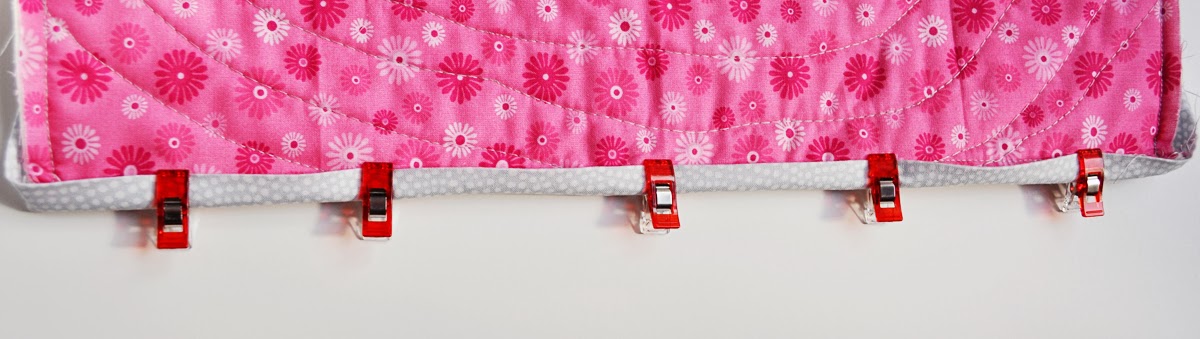
This is where you have to be slow and steady! Line up your needle so it is almost to the very edge of your binding and start sewing with a straight line down the edge. Remove your clips when you get to them.

When you get to the corner hold your binding down like this:

And then fold over the other side. Do not sew clear off the edge. Just sew a little past the folded edge and secure it.

Then rotate your quilt and start sewing down the other edge:

Continue to sew all the way around your quilt until you come back to where you started.
Now you are done! Look how pretty that mitered corner is!! :)

Machine binding is overall faster than hand binding, but I actually prefer the look of hand binding. My mom actually did the binding on this quilt and she finished the binding by hand. The great thing about hand binding is that you can't see the stitches--so it pretty much blends in. If you are interested in doing it this way I would recommend learning it by watching a video on youtube. It's hard to teach something like that with just pictures.

Also if you notice, I did what's called a scrappy binding for this quilt. That just means I took a bunch of left over scraps and made the binding, rather than just using one fabric.

I am really happy with the way my quilt turned out! The only complaint that I have is I wish I would have made it a lap size--because it is so darn cute!

I hope you enjoyed following along with me in the series!

Anything Goes by Stitch by Stitch* CraftOManiac Monday Made by You Monday
Making Monday Marvelous Masterpiece Monday Design Wall Monday by Patchwork Times Blossom Heart Quilts*Show and Tell Tuesday by Fresh Squeezed FabricsTuesday by Free Motion by the River *Fabric Tuesday by A Quilt Story *Mandy's Recipe Box Tuesday *Time To Sparkle *Wow Me Wednesday at Polkadots on Parade Whimsy Wednesday at The NY Melrose Family *Wip Wednesday at Freshly Pieced Sew Fresh Quilts Let's Bee Social Wow Us Wednesday at Savvy Southern Cottage *We Did It Wednesday! at Sew Much Ado Needle and Thread Thursday by My Quilt Infatuation *Really Random Thursday by Live a Colorful Life Thursday Threads by 627Handworks * I Quilt by Pretty BobbinsLink Party Palooza at Today's Creative Blog

5 comments:
Thank you for the tutorials. I recently finished binding a quilt with 8.5 by 2.5 inch scraps and out of curiosity, I measured the finished size of the mitered binding. It was 6" finished so that means that when you miter binding you lose the width of your binding for every miter that you have to make.
Great series! Love this fun quilt.
Great tutorial, and great pictures too! I have some of those fabrics for spring sewing for my granddaughter.
great tutorial!
Thank you so much for sharing at Needle and Thread Thursday!
:) Kelly @ My Quilt Infatuation
beautiful tutorial, thank you !
Post a Comment