Hi everyone! My name is Andy Knowlton and I blog at abrightcorner.com. I’ve been blogging for about seven years and I also design quilt patterns. You can find me most days on Instagram (abrightcorner), but if you’re more of a facebook person you can find me there too!
I love decorating my home for Christmas and quilted throw pillows are a great way to add color to your decor. I keep the same size pillows on my sofa all year round, and just swap out the pillow covers. It doesn’t take a lot of space to store the 3 or 4 Christmas pillow covers and it’s so fun to switch all of the pillows out several times a year.

This pillow tutorial makes a cover for an 18” pillow form. Here’s what you’ll need to make your own!
Fabric Requirements:
- 5/8 yard Postcards for Santa Teal Snowflake
- 1/3 yard Essentials Criss-Cross Holiday Red
- 1/4 yard solid white
- 19” x 19” piece of muslin or solid white for lining
- 19” x 19” piece of thin batting
- one 18” pillow form

Cutting:
From the Postcards for Santa print cut:
1 @ 6.5” x WOF. Subcut 4 @ 6.5” square
2 @ 12.5” x 18.5” for the pillow back
From the red print cut:
1 @ 6.5” x WOF. Subcut 1 @ 6.5” square, 4 @ 4.25” square and 4 @ 3.5” square.
2 @ 2.5” x WOF. Set aside to use for pillow binding
From the solid white cut:
1 @ 4.25” x WOF. Subcut 4 @ 4.25” square and 2 @ 3.5” square.
1 @ 3.5” x WOF. Subcut 10 @ 3.5” square.
Now let’s get started!

Step 1: On the four white 4.25” squares, draw a diagonal line from corner to corner with a pencil.

Step 2: Place each 4.25” white square, right sides together with a 4.25” red print square. Sew about 1/4” on each side of the drawn line.
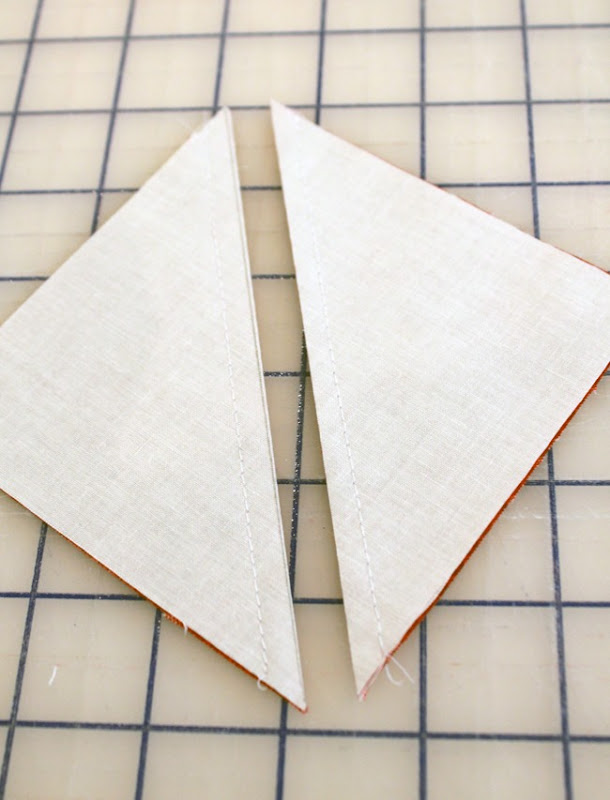
Step 3: Carefully cut along the drawn line. Press the half square triangles (HSTs) open with the seam allowance toward the print side.

Trim each HST to be 3.5” square. Repeat to make 8 total (3.5”) HSTs.
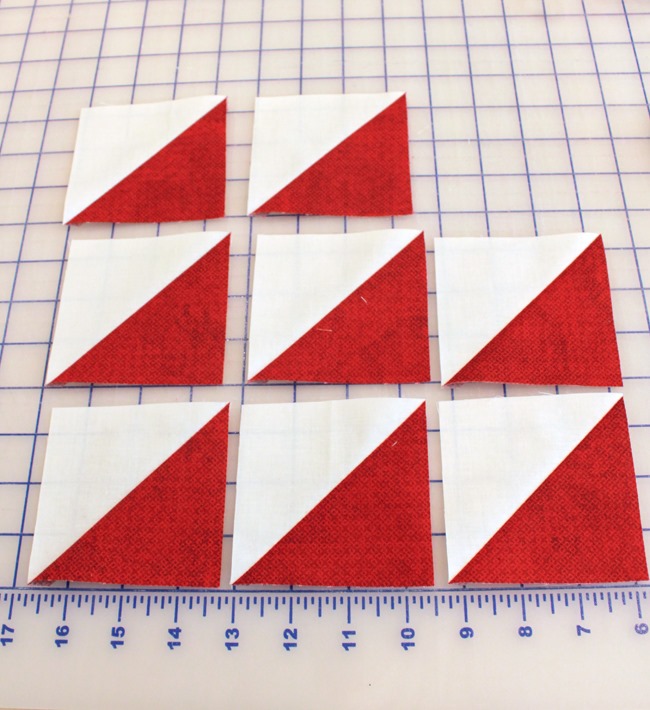
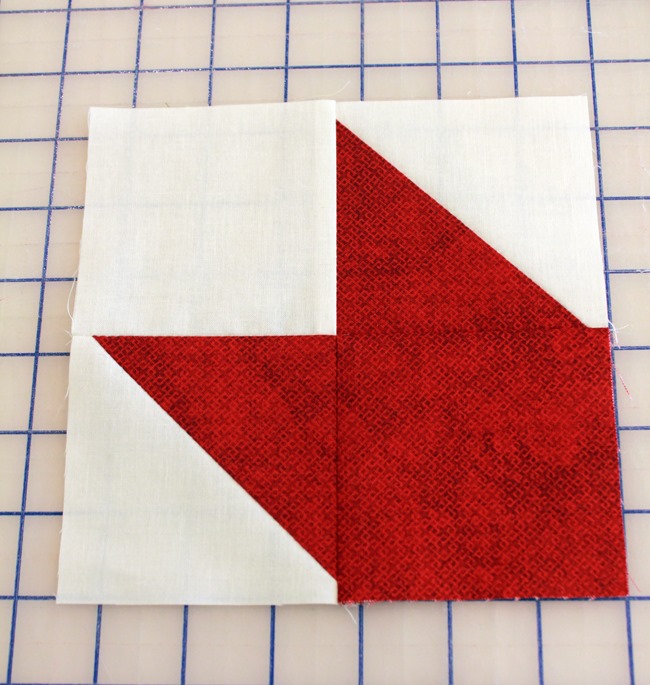
Step 4: Use one 3.5” white square, one 3.5” red square and two of the half square triangles (HSTs) to create a corner block unit as shown in the diagram below.

Repeat to make four of these corner block units.
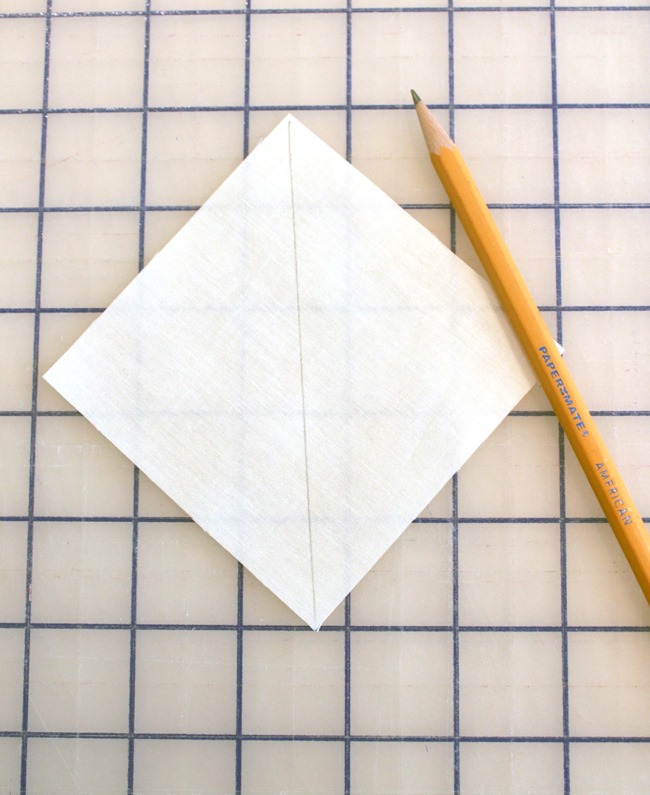
Step 5: On 8 of the 3.5” white squares, draw a diagonal line from corner to corner with a pencil.
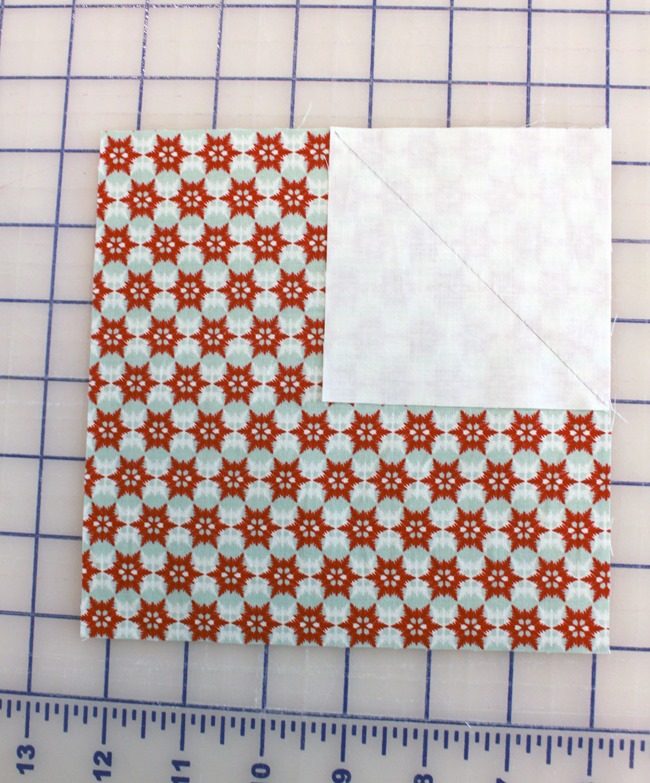
Step 6: Place one 3.5” white square on one corner of a 6.5” main print (Postcards for Santa) square.

Sew right on the drawn line. Trim about 1/4” away from stitching.
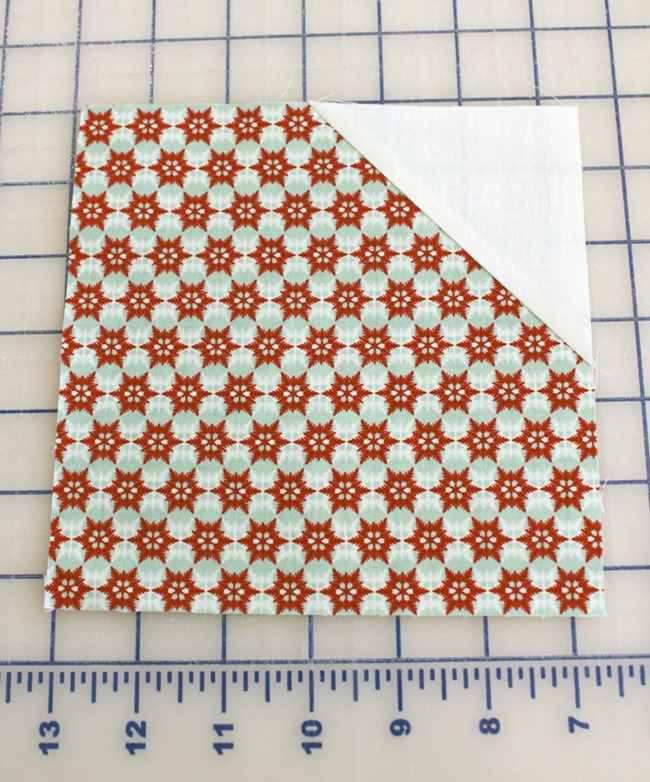
Fold open the corner and press.

Step 7: Place a second 3.5” white square on an adjacent corner of the 6.5” main print square. Sew on the drawn line. Trim about 1/4” away from seam.
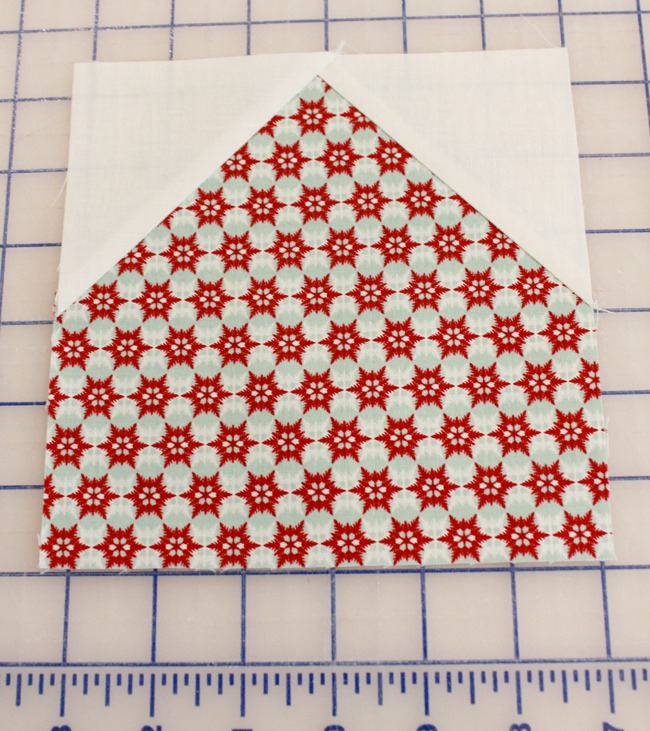
Fold open the corner and press. Repeat to make four of these from the 6.5” main print (Postcards for Santa) squares.
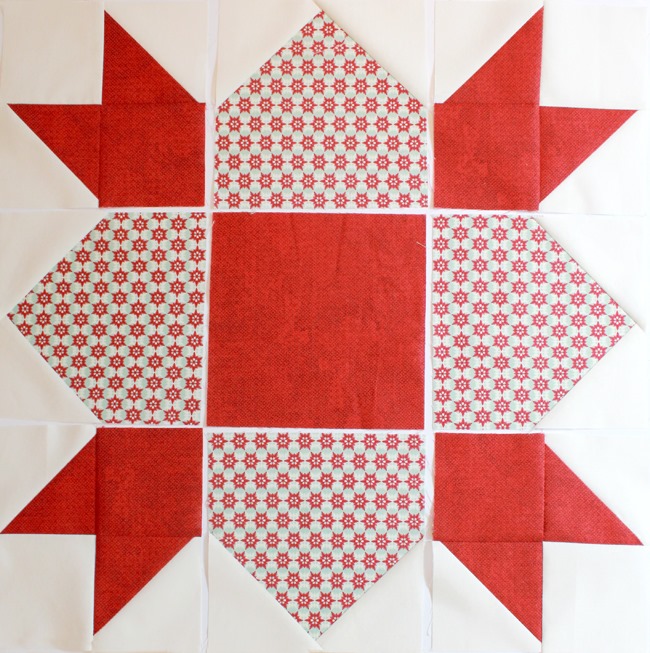
Step 8: Lay out block sections as shown. Sew into rows using a 1/4” seam. Press seams of row 1 and 3 towards the center. Press the seams of row 2 away from the center. Sew rows together, matching seams. Press.

Step 9: Layer the 19” square piece of muslin, the thin batting, and then the pillow top (right side up). Quilt as desired. Then trim the edges of the lining and batting to be even with the pillow top (should be 18.5” x 18.5”).

Step 10: Find the 12.5” x 18.5” pillow back pieces. On one long edge of both pieces, fold under 1/2” and then again another 1/2”. Press well.

Top stitch in place.
Step 11: Layer the pillow top (right side down), then the two pillow back pieces (right sides up), with the raw edges of the back pieces matching up with the raw edges of the pillow top. The folded/top stitched edges of the pillow backs should overlap somewhere in the middle of the pillow.

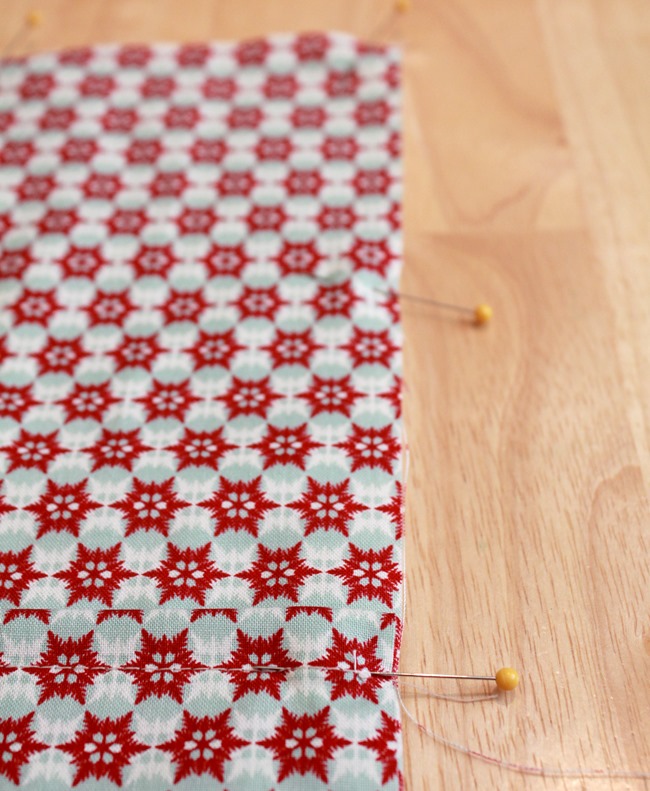
Pin around the outside edge of the pillow.
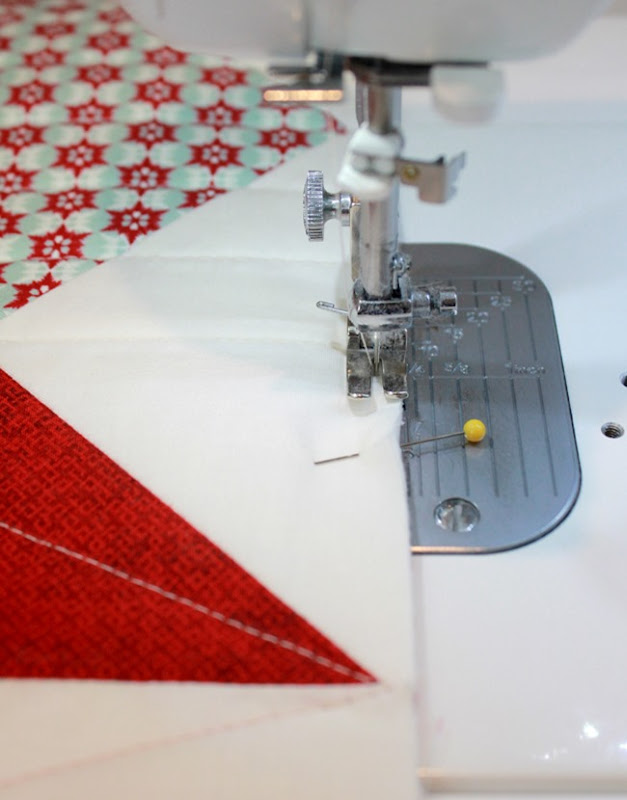
Baste around the outside edge of pillow using 1/8” seam. This will help to hold everything in place as you add the binding.
Step 12: Use the 2 (2.5” wide) strips of red fabric to create a binding. Bind the pillow as you would a quilt. For this pillow I machine stitched the binding to the front, folded it to the back and hand stitched it in place.
Insert the 18” pillow form. Your pillow is all done!
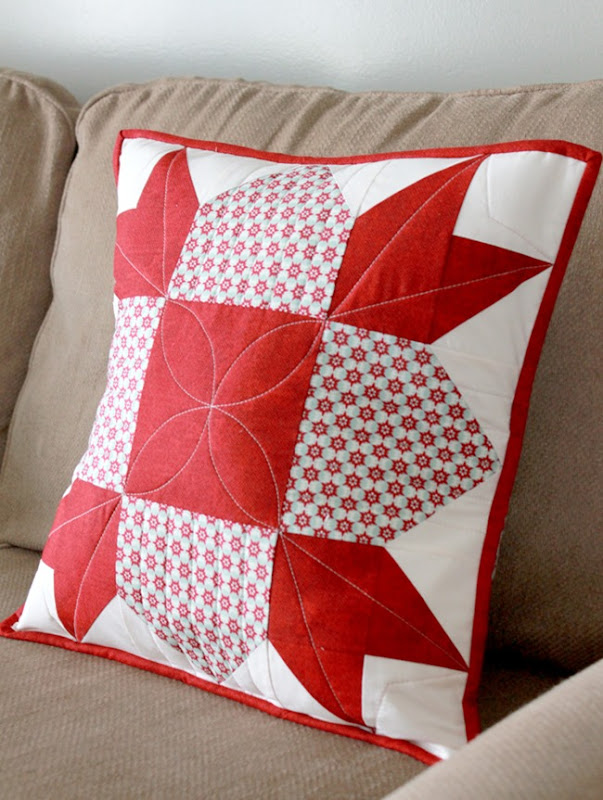
As an alternative, after it is quilted don’t add the pillow backing – just bind and use as a table topper!

I want to thank Andy for stopping by today to share this festive pillow with us! You can find Andy:


2 comments:
Very pretty pillow, thanks for the tutorial
I love this design! thanks!
Post a Comment