
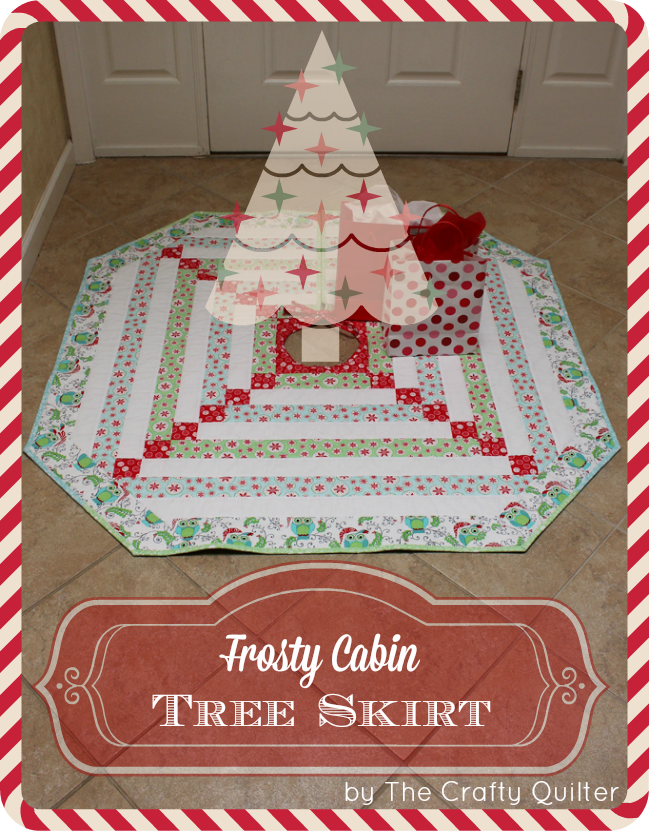
Hey everyone! My name is Julie Cefalu and I've been quilting for 16 years and I work and teach classes in a local quilt shop in California. You can also find me at The Crafty Quilter. I have lots of free tutorials and tips on my blog that I hope will inspire you. I'm really happy to be sharing my Frosty Cabin Christmas Tree Skirt tutorial here at Fort Worth Fabric Studio.
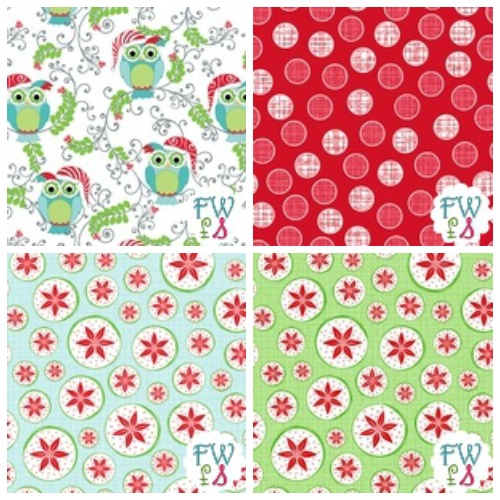
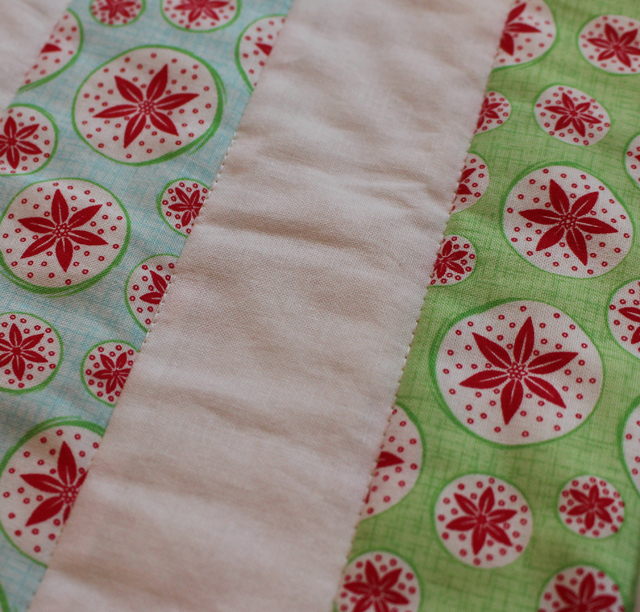
For this project, I'm using the Frosty Forest collection by Cherry Guidry for Benartex.
The finished size of this tree skirt is 46" wide. Fabric requirements:
- A 3/4 yard, white
- B 1/4 yard, Frosty Forest Poinsettia Circles, green
- C 1/4 yard, Frosty Forest poinsettia Circles, aqua,
- D 1/4 yard, Frosty Forest Dots, red
- E 2/3 yard, Frosty Forest Owls, white
- (10) 2 1/2" strips, subcut into (8) 2 1/2" x 28 1/2" rectangles, (4) 2 1/2" x 20 1/2" rectangles, and (4) 2 1/2" x 12 1/2" rectangles
- (4) 2 1/2" strips, each subcut into (4) 2 1/2" x 24 1/2" rectangles and (4) 2 1/2" x 8 1/2" rectangles
- (6) 2 1/2" strips, subcut into (4) 2 1/2" x 16 1/2" rectangles and (4) 2 1/2" x 32 1/2" rectangles
- (1) 8 1/2" square
- (24) 2 1/2" squares
- (6) 3 1/2" strips, subcut into (4) 3 1/2" x 20 1/2" rectangles and (4) 3 1/2" x 25 1/2" rectangles
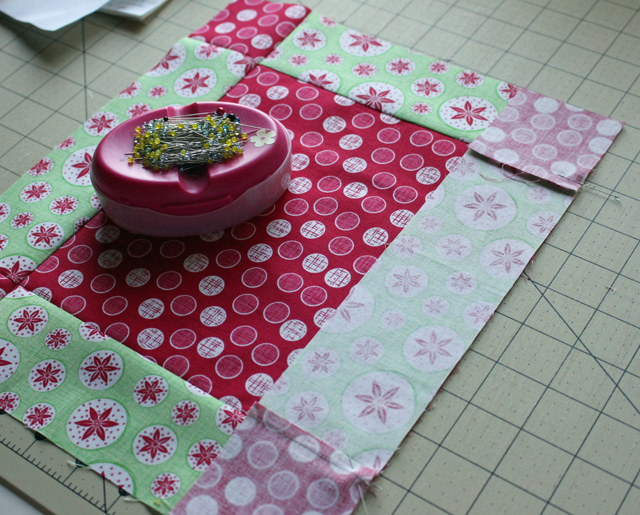
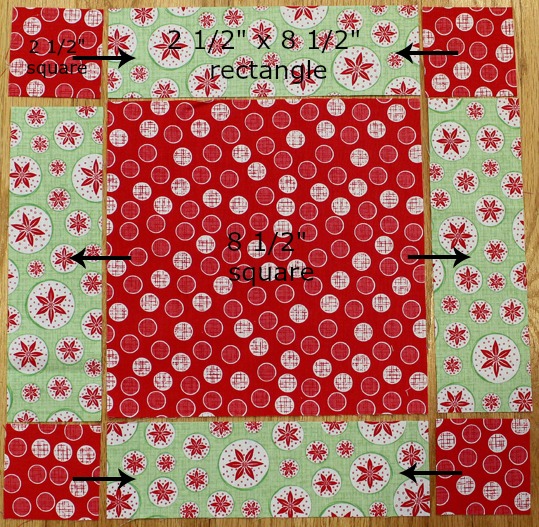 On the remaining two fabric B rectangles, stitch a fabric D 2 1/2" square to each short end. Press towards fabric B.
Stitch each pieced unit to the remaining two sides of the fabric D center square. Press towards the rectangles.
On the remaining two fabric B rectangles, stitch a fabric D 2 1/2" square to each short end. Press towards fabric B.
Stitch each pieced unit to the remaining two sides of the fabric D center square. Press towards the rectangles.
 Round 2: Repeat that same process as above, using fabric A 2 1/2" x 12 1/2" rectangles.
 Round 3: Repeat again, using fabric C 2 1/2" x 16 1/2" rectangles.
Round 4: Repeat again using fabric A 2 1/2" x 20 1/2" rectangles.
Round 5: Repeat again using fabric B 2 1/2" x 24 1/2" rectangles.
Round 6: Repeat again using fabric A 2 1/2" x 28 1/2" rectangles.
Round 3: Repeat again, using fabric C 2 1/2" x 16 1/2" rectangles.
Round 4: Repeat again using fabric A 2 1/2" x 20 1/2" rectangles.
Round 5: Repeat again using fabric B 2 1/2" x 24 1/2" rectangles.
Round 6: Repeat again using fabric A 2 1/2" x 28 1/2" rectangles.
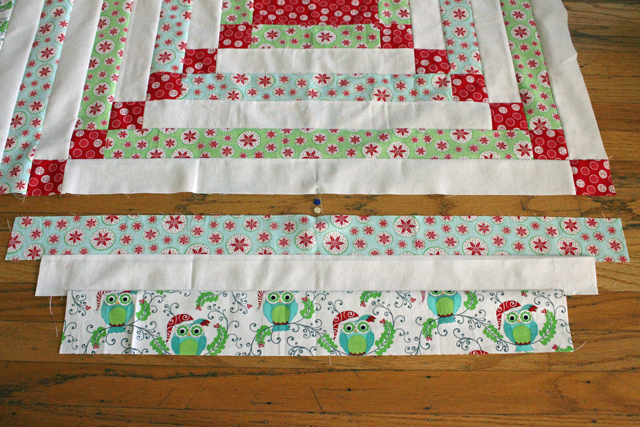
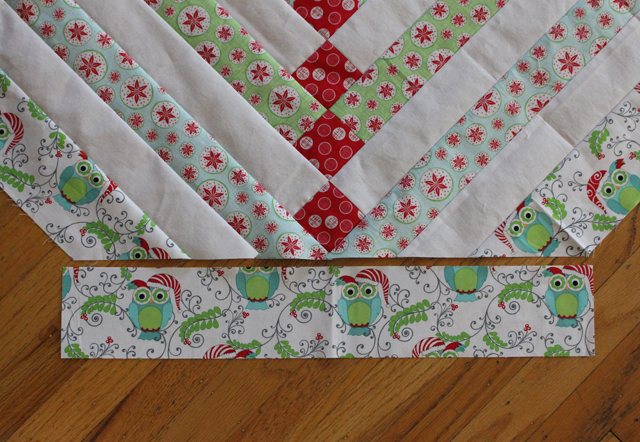
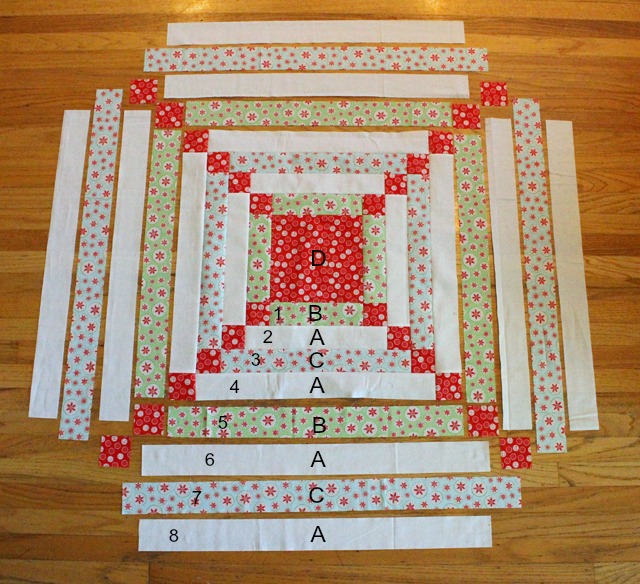 Round 7-9: These rounds will not have red 2 1/2" squares attached. It's more efficient to stitch together a fabric C 2 1/2" x 32 1/2" rectangle, fabric A 2 1/2" x 28 1/2" rectangle and fabric E 3 1/2" x 25 1/2" rectangle. Make sure to center each strip onto the preceding one. They will be decreasing in length. Repeat to make a total of 4 strip sets.
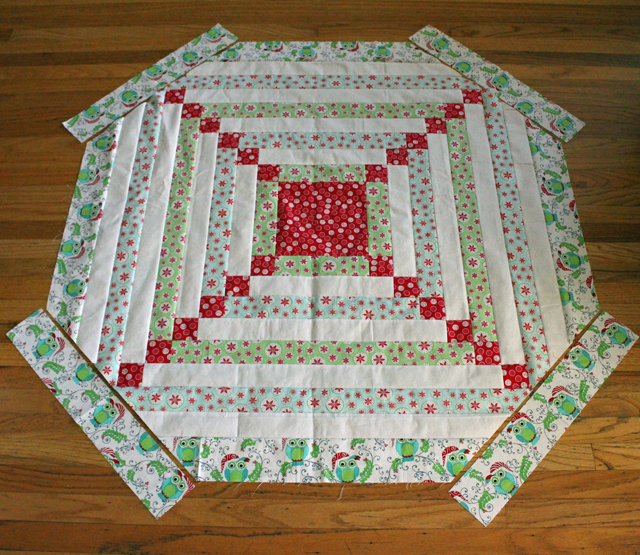
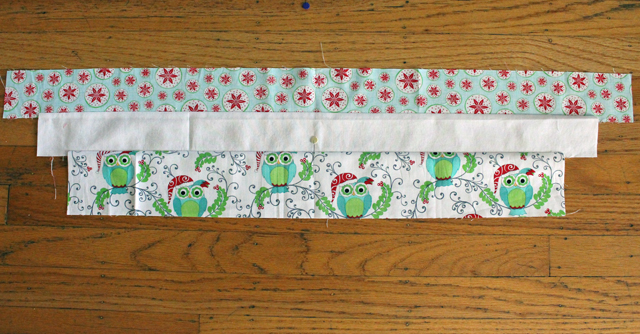 Stitch a strip set to each side of the tree skirt. It's best to fold the strip set in half to find the center and match it to the center of each side.
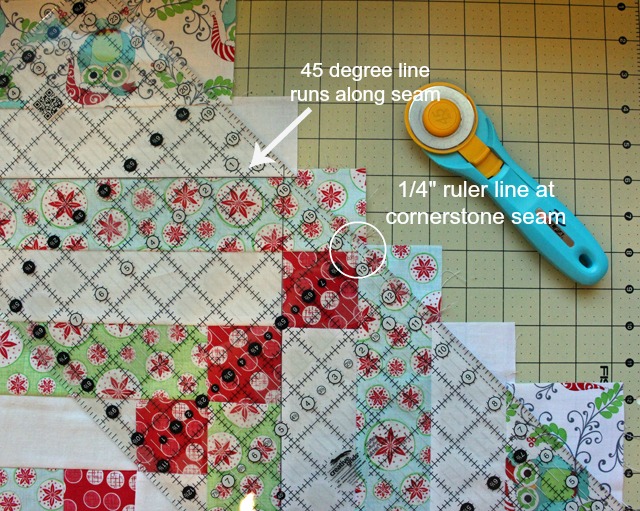
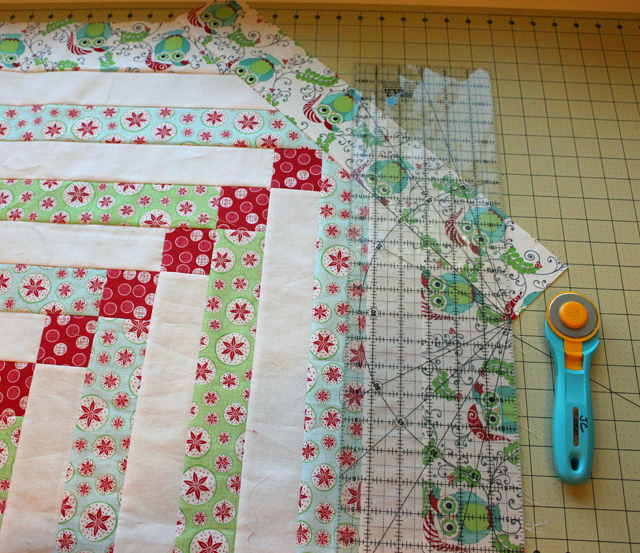
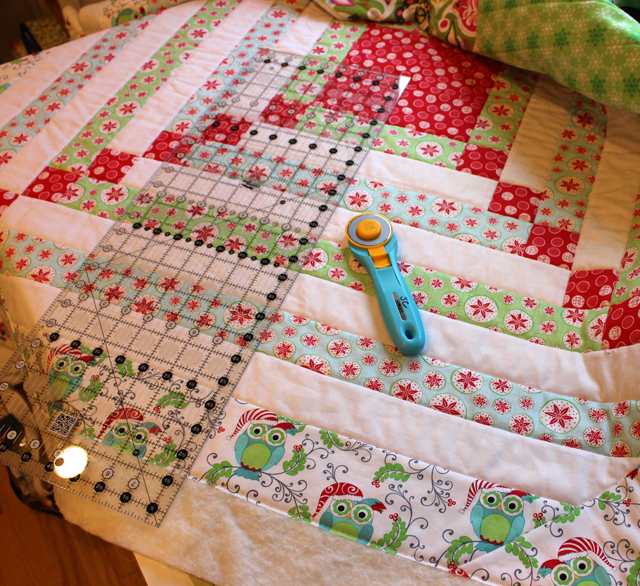
 Trim corners. Using a long ruler, trim each corner of the tree skirt. Line up the 1/4" line of the ruler so it's on the outer 2 1/2" red cornerstone seam and the 45 degree line of the ruler is lining up with one of the strip seams. Trim. Repeat for all corners.
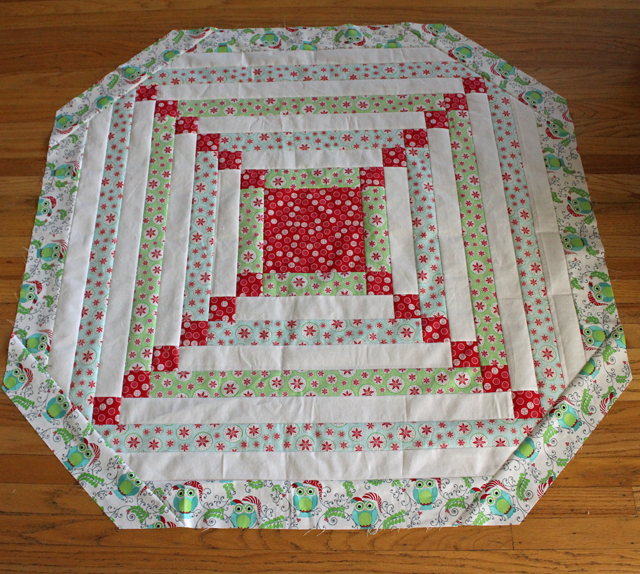
 Stitch the remaining Fabric E border rectangles to each corner, centering the strip on each corner. (It will be slightly longer than necessary). Press towards the border.
 Trim each corner even with the previous side.
 Layer the tree skirt top, batting and backing. Baste they layers together and quilt. I did simple stitching in the ditch.
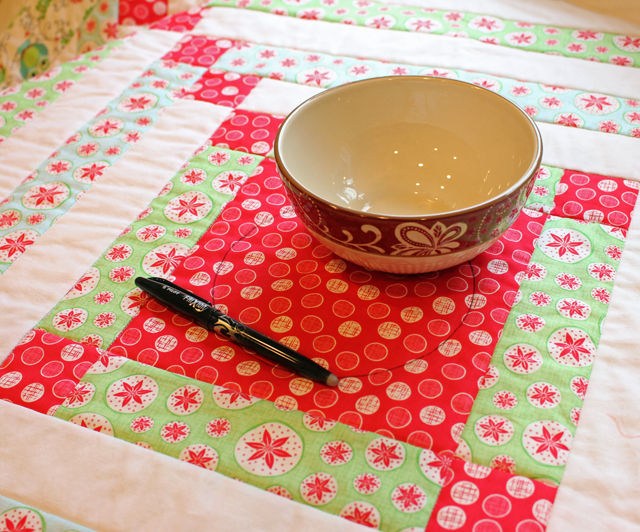
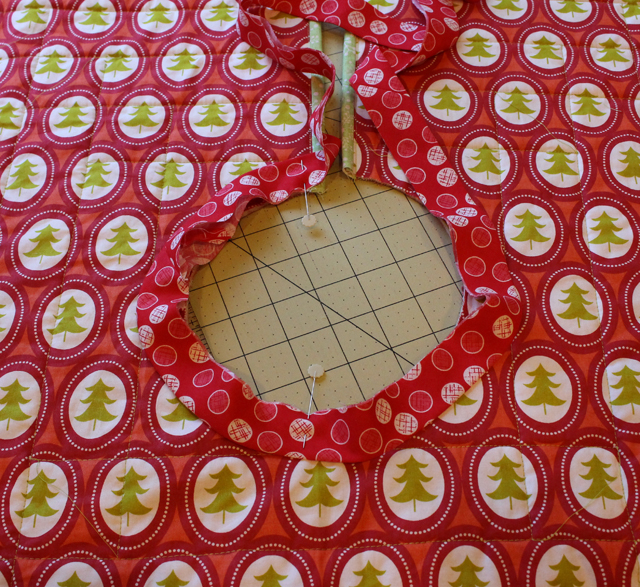
 Using a bowl that is about 6" wide, draw a circle in the middle of the red, center square. Stitch or baste by hand 1/8" outside the drawn line (away from the center).
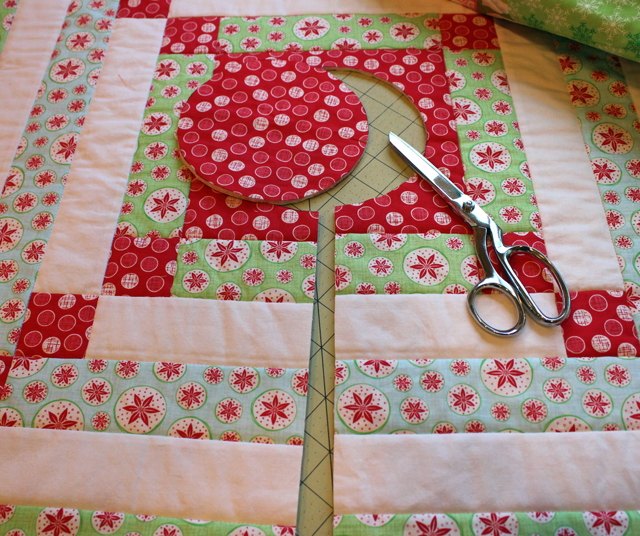
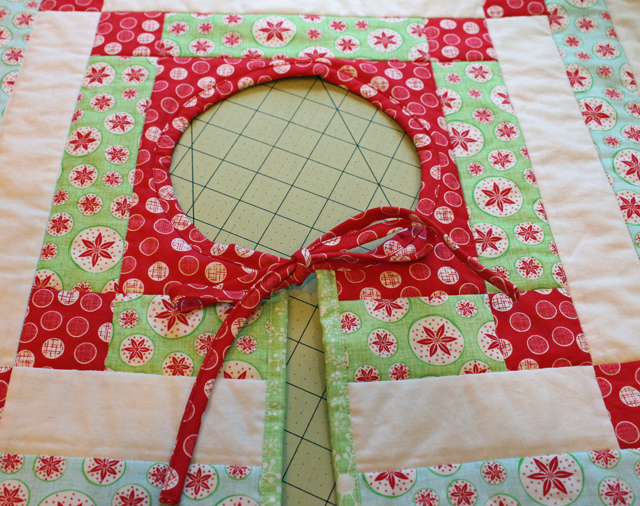
 Find and mark the center of one long side of the tree skirt. Mark the center of the circle. Using a long ruler, line it up along the center marks and cut straight into the tree skirt until you reach the circle.
 Cut around the circle on the drawn line.
 Binding:
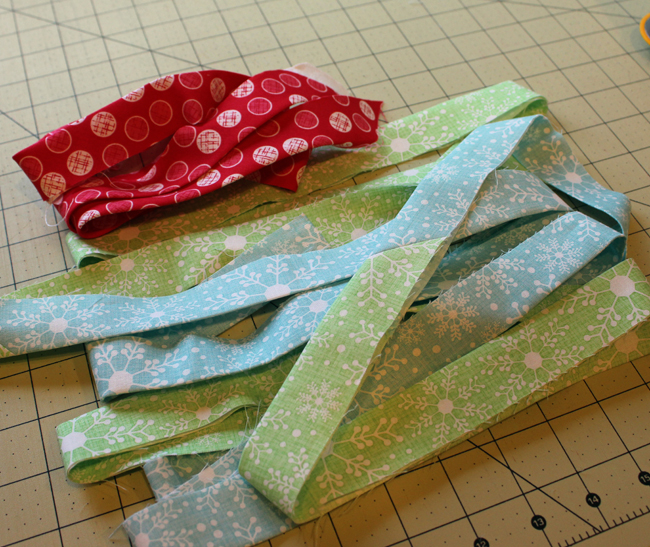
Since the center of the tree skirt is a circle, it will be necessary to use bias binding for that section. The rest of the binding can be cut on the straight of grain. Cut the straight binding fabric into (5) 2 1/4" x WOF strips. Sew together with diagonal seams. I've used two different fabrics for this one. Cut the bias binding into enough strips to measure 2 1/4" x 50" long when sewn together. This will also create the ties for the center opening. Note: You can cut all of your binding strips on the bias if you prefer.
Binding:
Since the center of the tree skirt is a circle, it will be necessary to use bias binding for that section. The rest of the binding can be cut on the straight of grain. Cut the straight binding fabric into (5) 2 1/4" x WOF strips. Sew together with diagonal seams. I've used two different fabrics for this one. Cut the bias binding into enough strips to measure 2 1/4" x 50" long when sewn together. This will also create the ties for the center opening. Note: You can cut all of your binding strips on the bias if you prefer.
 I have a few thoughts on attaching the binding. I decided to sew my binding onto the back of the quilt and then wrap it around to the front of the quilt. I then machine stitched it into place, close to the folded edge. This is the opposite of traditional binding, but I knew that I wanted to stitch it all by machine and so this is the technique that I used. Feel free to use whatever works best for you. The following instructions and photos are based on my method.
Begin by attaching the straight binding, starting at the center circle, using a 1/4" seam allowance.
I have a few thoughts on attaching the binding. I decided to sew my binding onto the back of the quilt and then wrap it around to the front of the quilt. I then machine stitched it into place, close to the folded edge. This is the opposite of traditional binding, but I knew that I wanted to stitch it all by machine and so this is the technique that I used. Feel free to use whatever works best for you. The following instructions and photos are based on my method.
Begin by attaching the straight binding, starting at the center circle, using a 1/4" seam allowance.
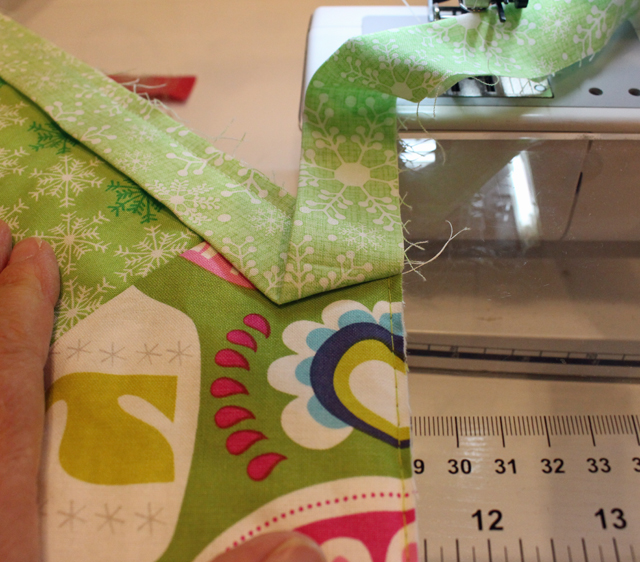
 The first corner you come to will be a right angle, and you will miter the corner as you normally would. The rest of the corners will be a wider angle and need to be approached differently. Before you get to the next corner, fold the fabric to the right so that it is lined up with the next edge. Finger press, forming a crease.
 You will stop stitching with the needle down at the crease and then pivot. Stitch along the crease, out to the corner.
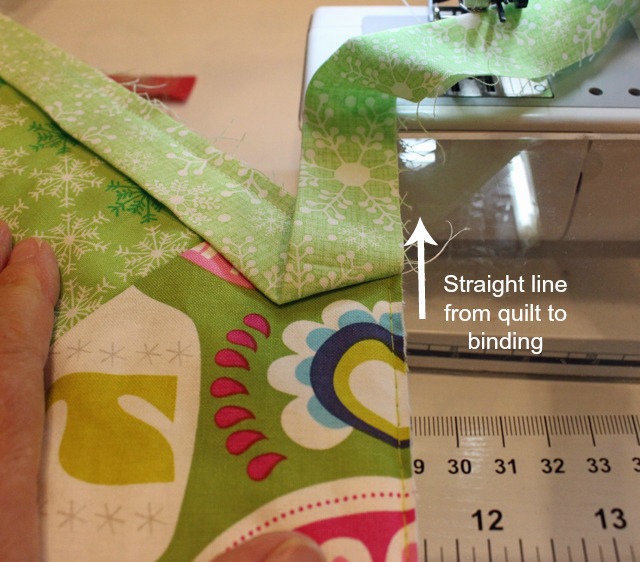
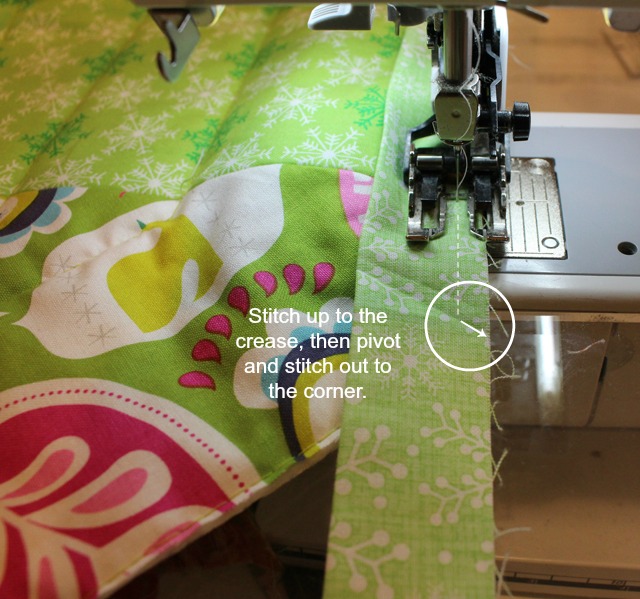 Now you'll fold the binding up and away from the corner, very similar to when you made the crease. You should see a straight line from the new edge of the quilt and the edge of the binding.
 Next, fold the binding back down on itself, with the top folded edge just above the corner. Pin and begin stitching at the fold.
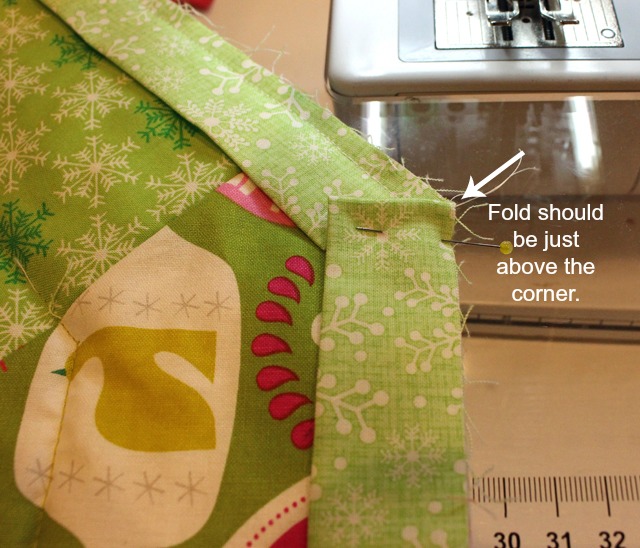 .
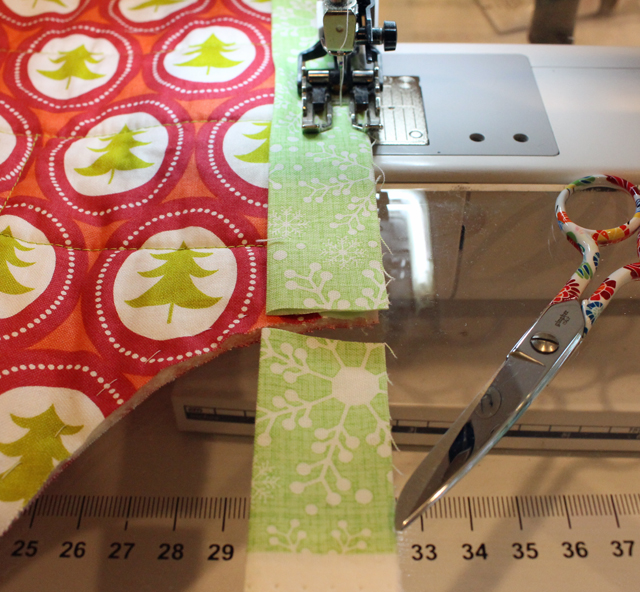
Continue around the whole quilt, ending at the other edge of the center circle. Trim the binding tail even with the circle's edge.
.
Continue around the whole quilt, ending at the other edge of the center circle. Trim the binding tail even with the circle's edge.
 Lightly press the binding out and away from the quilt.
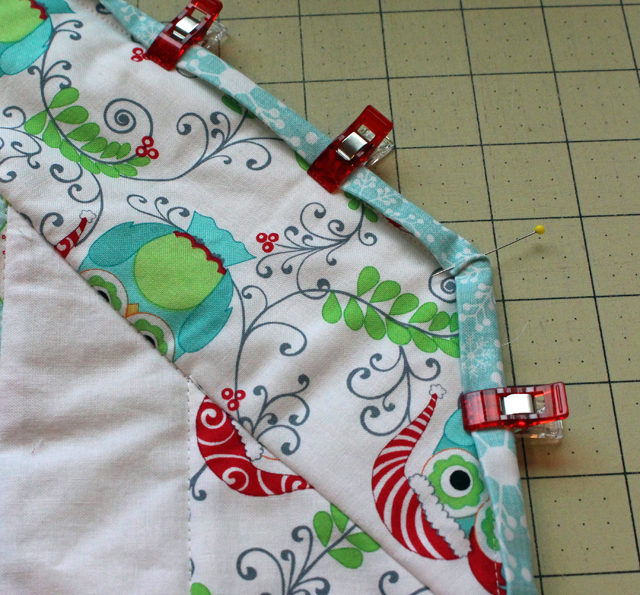
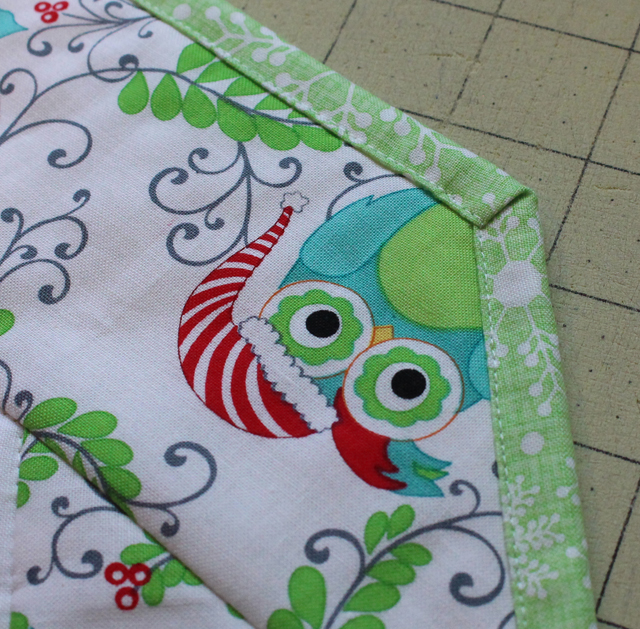
 The corners will miter automatically on the first side. You'll have to fold them to miter on the other side.
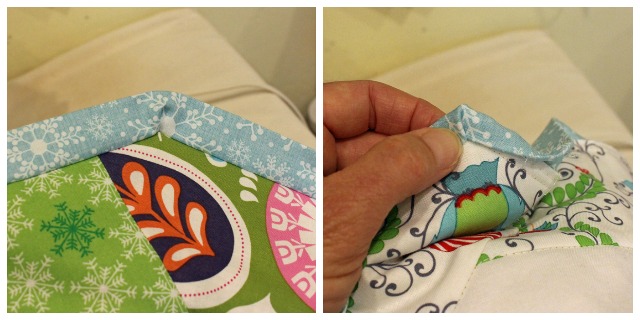 I use Wonder Clips to hold the binding in place as I stitch. I use a pin to hold the corners.
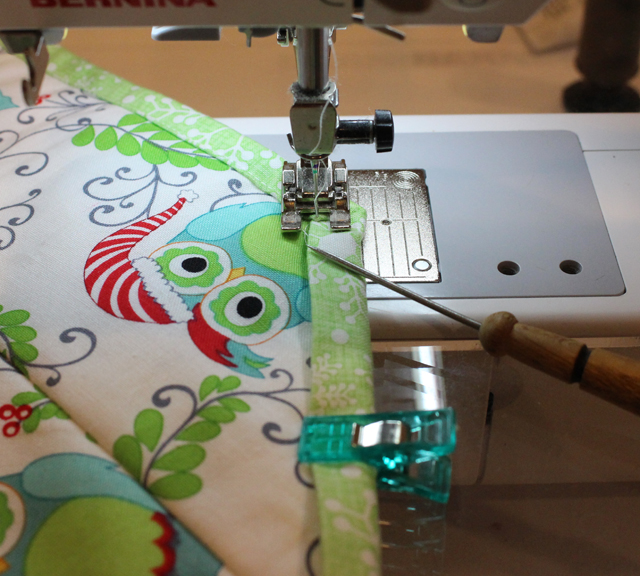
 Make sure your bobbin thread matches the back side of your quilt. You want to stitch as close to the folded edge as possible.
 Stop and pivot when you get to the corners. Continue stitching around.
 Now it's time to add the bias binding around the center circle. Clip the curves of the circle every inch or so (just a scant 1/4" inside the cut edge).
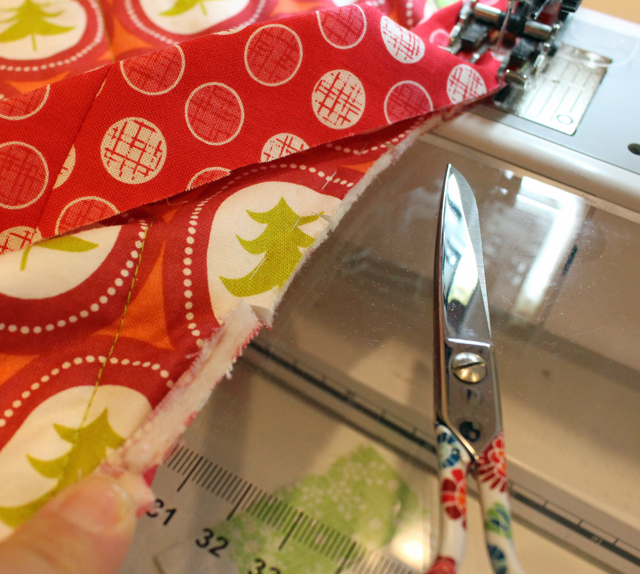 Prepare the binding by folding the short end of the binding tails 1/4" and press. Then press the length in half.
 Find the center of the binding and pin it to the center of the circle. Bring the binding to the opening of the circle and pin.
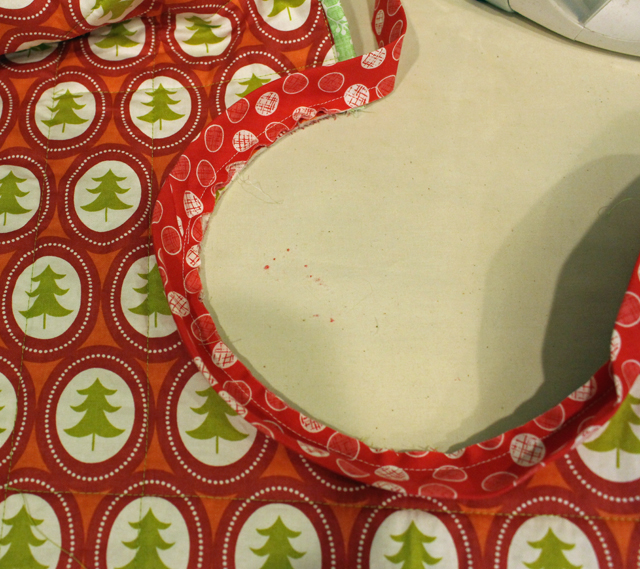
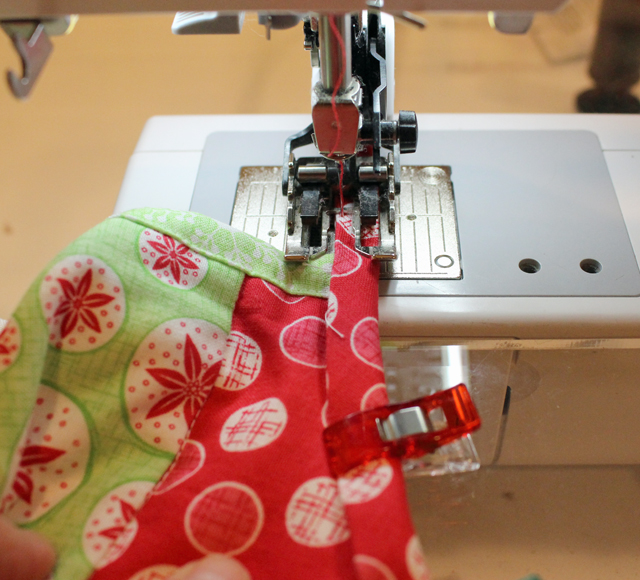
 Begin stitching at the opening of the circle, easing the binding around and pulling the clipped sections straight in front of you as you go. Continue until you get to the other side of the opening and stop.
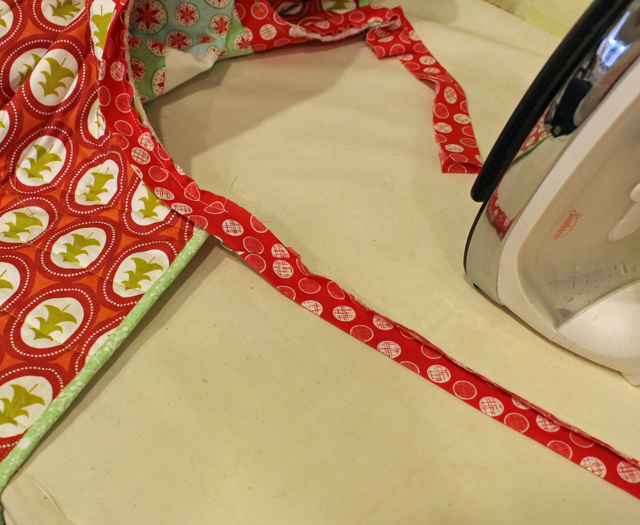
Bring the quilt to the ironing board so you can press the binding away from the first side.
Begin stitching at the opening of the circle, easing the binding around and pulling the clipped sections straight in front of you as you go. Continue until you get to the other side of the opening and stop.
Bring the quilt to the ironing board so you can press the binding away from the first side.
 Press the tail section that will form the ties. Press the raw edges in 1/3 of the way. Then press the folded edge over to meet it.
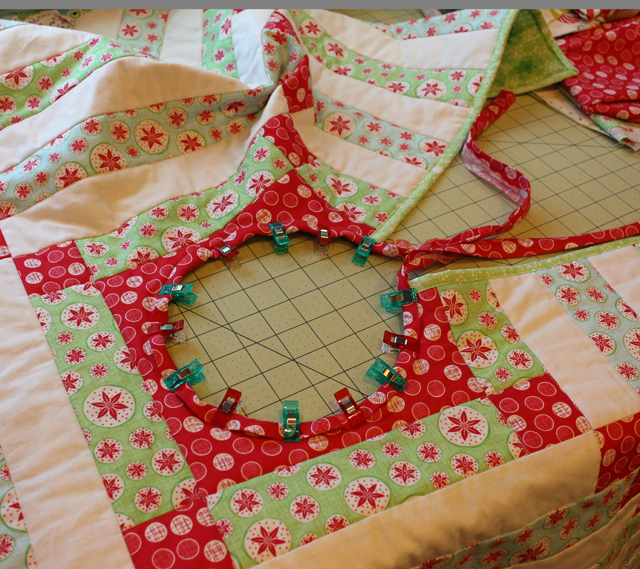
 Clip or pin the binding in place around the circle.
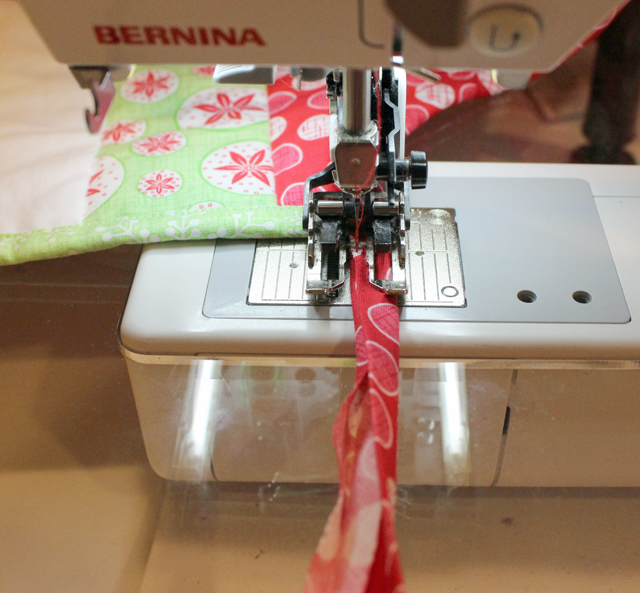
 Begin stitching at the binding tail (the tie end) close to the edge.
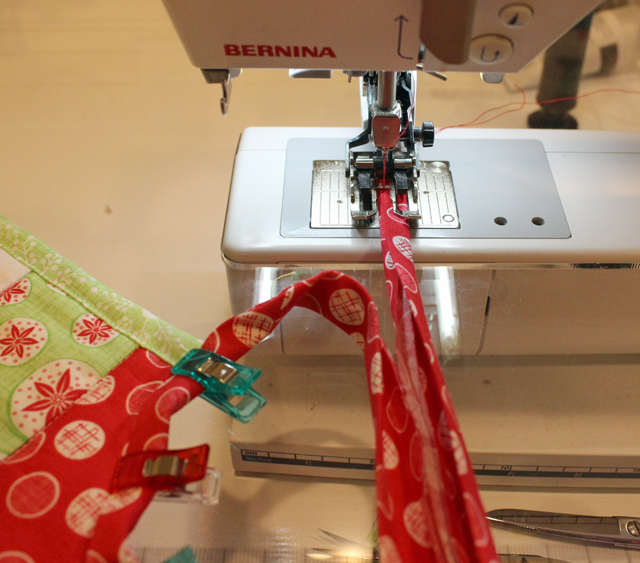 Continue stitching onto the center circle opening.
 And all the way off the other opening onto the final binding tail (tie end). Continue until you reach the end.
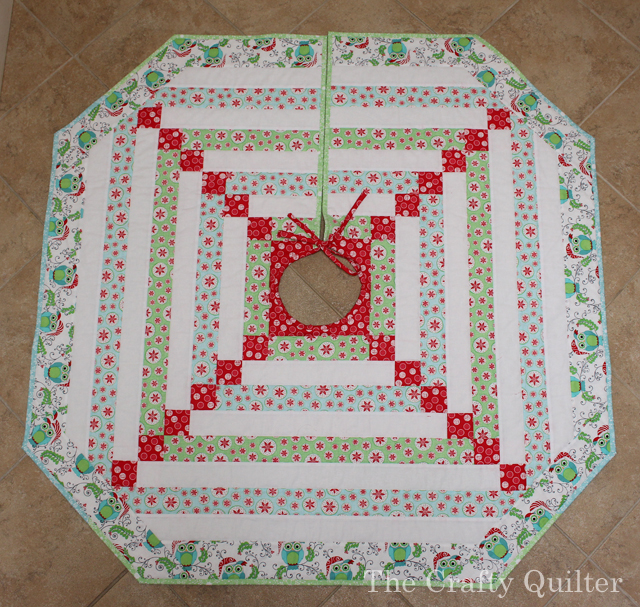
 Your binding is complete and your ties are finished!
 Enjoy your Frosty Cabin Tree Skirt!
Thanks Julie for this adorable Tree Skirt Tutorial! :) You can find Julie:

5 comments:
So pretty and great instructions!
Beautiful! And now that I see it before it has been cut for a tree skirt, I can see it would also make a beautiful table topper!
So pretty! Great tutorial - thank you!
Thank you for clearly explaining the center circle, I struggled with that when I made a tree skirt last year and this will make it so much easier the next time around!
~Brandy
brandizzle7133 at gmail dot com
Is it easy to use a jelly roll for this?
I have a Kate Spain Solstice roll ......
Post a Comment