
Hi there! Cherise is back to share page six and the Cover Page in this adorable Vintage Market Quiet Book!
We hope you will follow along each week and if you decide you want to make one too - please use the hashtag #sewingwithfwfabricstudio on Instagram so we can see!
Part 5: HERE
Hi everyone!
We're back this week to do our last page and start putting some finishing touches on our pages! We are in the homestretch now! I hope you all are enjoying this so far and really seeing your pages comes to life!
Last week we cut out Page 6, our Front and Back cover; made our Cover page, sewed our pages together to make 4 page units and added fusible fleece or batting to our pages! That was a lot of work!
This week we're going to do Page 6 and go back and finish our pages that need to be finished.
Step 11: Making Page
6- Ribbons and counting beads page


I took my ribbon and measured from the bottom corner of my page to the ‘X’ and back again- this was how long I cut my ribbon- cut 2 pieces of ribbon.


Do this for both ribbons.
For the counting beads part I thought that the clothesline
with the quilts would be perfect to mirror the ribbon with the beads. Take some
thin ribbon and measure the length of the clothesline and then double that
measurement and cut the ribbon. Form a bow close to one end of the ribbon and
attach it to one corner of the clothesline with your sewing machine, sewing
over the bow several times to secure it.


Wheww! Done page 6!
Step 12: Go back and finish the pages
We’ve left several pages with things that we could only do
after the fusible fleece or batting had been applied. Let’s go back and finish
them!
Go back to Page 1 and sew those buttons onto the area marked
previously, just above your ric rac stems. Page 1 is done!

Go to Page 2 and take the other half of the Velcro pieces
and sew them onto the center of the appliqued balloons. Done Page 2!

Go to Page 3 and hand sew those male snaps onto the middle
of each appliqued strawberry. Done Page
3!

Go to Page 4 and applique down the basket pocket that we
created. Take your pocket piece and line it up on top your basket on the quiet
page. Sew the top of the basket pocket using an applique stitch in coordinating
thread down until you reach the metal zipper part. Then, with thread that
coordinated with the basket base piece, start appliqueing from the other side
of the metal zipper and downwards around basket base up to the other side of
the metal zipper. Now your pocket should be fully sewn onto the basket with the
zipper opening and closing the pocket. You can top stitch down around the edges
of the pocket to secure it even more. Now you’re done page 4!

Go to Page 5 and sew the other half of your Velcro pieces to your shapes page. Placed the other half of the Velcro pieces around the outside of the shapes, making sure that they’re not over top of the stitching that shows that shape. The exception to this is the circle where I put the Velcro inside the circle. Now you are done Page 5!


---------------------------------------------
We`re onto doing some fun and different things this week! We`re going to add some fusible fleece or batting to our book and also do our Cover Page and Back Cover page! You must be thinking- What happened to Page 6? Don't worry, I haven't forgotten about it but I leave Page 6 until the end!! It's easier to sew Page 6 once our fusible fleece or batting is in place.Last week we did Page 5- our Shapes page!

Now onto our next steps!
Step 7: Cutting out Page 6, Back and Front Cover pages
Page 6 is designed to be a page that has ribbons for a child
to learn how to tie a bow and also some beads for counting. For now, we’re
just going to cut the rectangle out for this page. I chose the ‘Vintage sign’
on one of the tents for my ribbons and the clothesline with quilts as a great
place for a string of counting beads. Fussy cut 1 8 ½” L x 8 ¾” W rectangle
making sure to get the Vintage sign tent and the quilt clothesline centered.
Set this page aside for now. You can see Page 6 in this picture.

Choose fabric for your Front Cover page and fabric for Back
Cover page and cut out 1 8 ½” L x 8 ¾” W rectangle for each page.

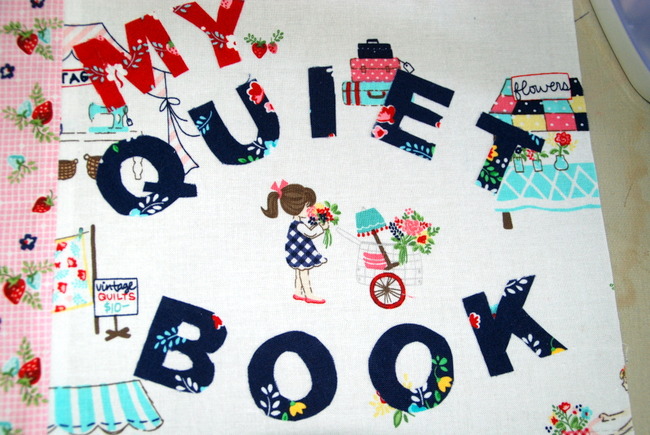
Step 8: Making your Front Cover

For my Front cover I knew that I wanted that sweet little
brown haired girl with the cart holding the flowers to be centered. She reminds
me of my youngest dark haired daughter- so sweet! I arranged my words around her to make this
design pop.
I went the computer and found a font that I liked and typed
up the words I wanted and traced them onto fusible web. Then I cut the fusible
web and applied it to the backside of the fabric I wanted for each letter.

I then cut out my letters, arranged them onto my page and ironed them down. I appliqued the letters in coordinating thread- this took some time and patience but I love how it turned out! Keep in mind that you can’t put letters in ¼” seam allowance around the edges of your fabric.

Step 9: Putting the pages in order and sewing them together
Now we’re going to lay out all the pages in their proper
order. I find that it’s best to label each page with its name and page number.
Refer to the diagram you made when you planned your quiet book.
Lay the pages out in the following order:
Back Cover- Front Cover
Page 1- Page 6
Page 5- Page 2

Page 3- Page 4

This is what it looks like all laid out together


I took these pictures at the beginning before I added anything to my pages but your pages will be in the same order but with the designs we've already done on them.
Now take the Front cover page and lay it over top of your
Back cover page, right sides together (RST).
Place page 6 to page 1 RST; page 2 to page 5 RST; and page 4 to page 3
RST. Make sure the pages are the right
way up since your fabric design is directional!! Sew along that right edge with
a 1/4” seam allowance for all pages. Take the page and lay it face down and
iron your seam allowance open.


You will have 4 sets of pages measuring 8 ½" L x 17” W.
Step 10: Applying fusible fleece or batting
Next we’ll apply either fusible fleece or batting to give
the pages some stability. Cut the fusible fleece or batting 7 ¾” L x 16 ¼” W,
one for each page unit. Center the fleece or batting on the back of your page, making
sure that it is at least ¼” away all four edges of your fabric.

I used fusible fleece so I just had to fuse it to my page
with my iron and it was done! If you’re using batting then you will baste it to
your page and quilt on your page, over top of all your designs that you’ve already
done. This is why we haven’t sewn any buttons, Velcro, snaps to our quiet page
yet!
Wheww!! This stage does take a while, especially with all that applique on your cover page and also quilting your pages if you're using quilt batting as opposed to fusible fleece. It's worth it though!
Next week we'll look at doing Page 6 and then going back to complete all those other pages where we left some things to the end!
Thanks for following along!
Happy Sewing!
Cherise


Cherise


1 comment:
Thanks for these lovely tutorials - I have saved my weekly email links and hope in the not too distant future to have a go at making one :)
Post a Comment