

Hello, I'm Deana from Dreamworthy Quilts and welcome to the FOURTH tutorial for the Fort Worth Fabric Studio Shimmer Braid QAL. The first, second, and third tutorials can be found at the links below:
It is FREE so come sew along! This is the fourth of five months, and the remaining tutorial will post on the second Tuesday of May.
Here is what we are making. It is 70" x 70" with adaptations for a queen sized quilt.

Here is how the Queen size will look. It is 86" x 96". The final white border can be larger if desired.

As a reminder, Fort Worth Fabric Studio has a great linky party on Fridays where we would love to see your progress on this or any project you are working on.
------------------------------------------------
Tutorial for Month 4
Download PDF Pattern HERE
Paper Piecing Pattern HERE
Center Block Pattern HERE
Triangle Template Pattern HERE

and 1 center block that finishes at 8" square.

CUTTING


2. Sew the strips together in any order and press the seams all in the same direction.


Download PDF Pattern HERE
Paper Piecing Pattern HERE
Center Block Pattern HERE
Triangle Template Pattern HERE
This month we will be making 4 star blocks that finish at
10" square
Click READ MORE below for the full tutorial:
CUTTING
White Fabric
Cut (1) 8" x 42" strip
Cut (1) 3 3/4" x 42" strip
Cut this Number
|
This size
|
Label it
|
From the 8” strip cut and label the following:
|
||
11
|
3 ¾” x 8”
|
Background for star blocks
|
From the 3 ¾” strip cut and label the
following:
|
||
5
|
3 ¾” x 8”
|
Background for star blocks
|
Cut all sixteen rectangles through the
diagonal. Cut 8 one direction and the
other 8 the opposite direction to yield a total of 32 triangles.
|
||
---------------------------------------------
If you purchased the "Mineral" shimmer fat quarter bundle, you can use two different dark greys instead of the black fabric purchased separately. (See month 1 instructions page 4). Cut the following according to your choice.
Two dark greys from the "Mineral" fat quarter bundle
Cut the following FROM EACH of the two dark grey fat quarters.
Cut (4) 2" x approximately 20" strips
Cut (4) 1 1/2" x approximately 20" strips
Cut (1) 3 1/2" x approximately 20" strip
Cut
this Number
|
This
size
|
Label
it
|
From
the 2” strips cut the following:
|
||
2
|
11 ½” x 2”
|
Sashing
|
2
|
10 ½” x 2”
|
Sashing
|
From
the 1 ½” strips cut the following:
|
||
2
|
10 ½” x 1 ½”
|
Sashing
|
2
|
12” x 1 ½”
|
sashing
|
From the 3 ½” strip cut and
label the following:
|
||
2
|
3 ½” x 6 ¾”
|
Center block
|
Cut the two rectangles
through the diagonal. Cut 2 one
direction and the other 2 the opposite direction to yield a total of 4
triangles.
|
||
OR
Black Fabric
Cut (1) 3 1/2" x 42" strip
Cut (3) 2" x 42" strips
Cut (3) 1 1/2" x 42" strips
Cut
this Number
|
This
size
|
Label
it
|
From
the 2” strips cut the following:
|
||
4
|
11 ½” x 2”
|
Sashing
|
4
|
10 ½” x 2”
|
Sashing
|
From
the 1 ½” strips cut the following:
|
||
4
|
10 ½” x 1 ½”
|
Sashing
|
4
|
12” x 1 ½”
|
sashing
|
From the 3 ½” strip cut and
label the following:
|
||
4
|
3 ½” x 6 ¾”
|
Center block
|
Cut the four rectangles
through the diagonal. Cut 2 one
direction and the other 2 the opposite direction to yield a total of 4
triangles.
|
||
-------------------------------------------------------
Various Fabric Strips
1. Cut approximately 7-9 strips anywhere from 1”
to 2” wide. These strips are cut from
fat quarters and need to be approximately 20” long. A variety of widths is best. I like to add a couple of white strips for a
more modern look.
2. Sew the strips together in any order and press the seams all in the same direction.
3.
Trim the strip unit to exactly 6 ¼” tall by trimming off one end or the
other.
4. Place the triangle template on the strip unit
and cut (8) triangle pieces from it.
Flip the template upside down every other cut. You will get 4 identical triangles for one
block and another 4 identical triangles for a different block.
------------------------------------------------------------------
Star Center Fabric - any color you choose
Each
star block will need (2) 4” squares cut through the diagonal to yield (4)
triangles.
Use these triangles for paper piecing the very center of the stars (piece #2).
-------------------------------------------------------------------
Center Block Fabric
Cut (2) 5” squares of one color
and (2) 5” squares of another color. Use
them to paper piece the center block.
 --------------------------------


8. Press.


11.
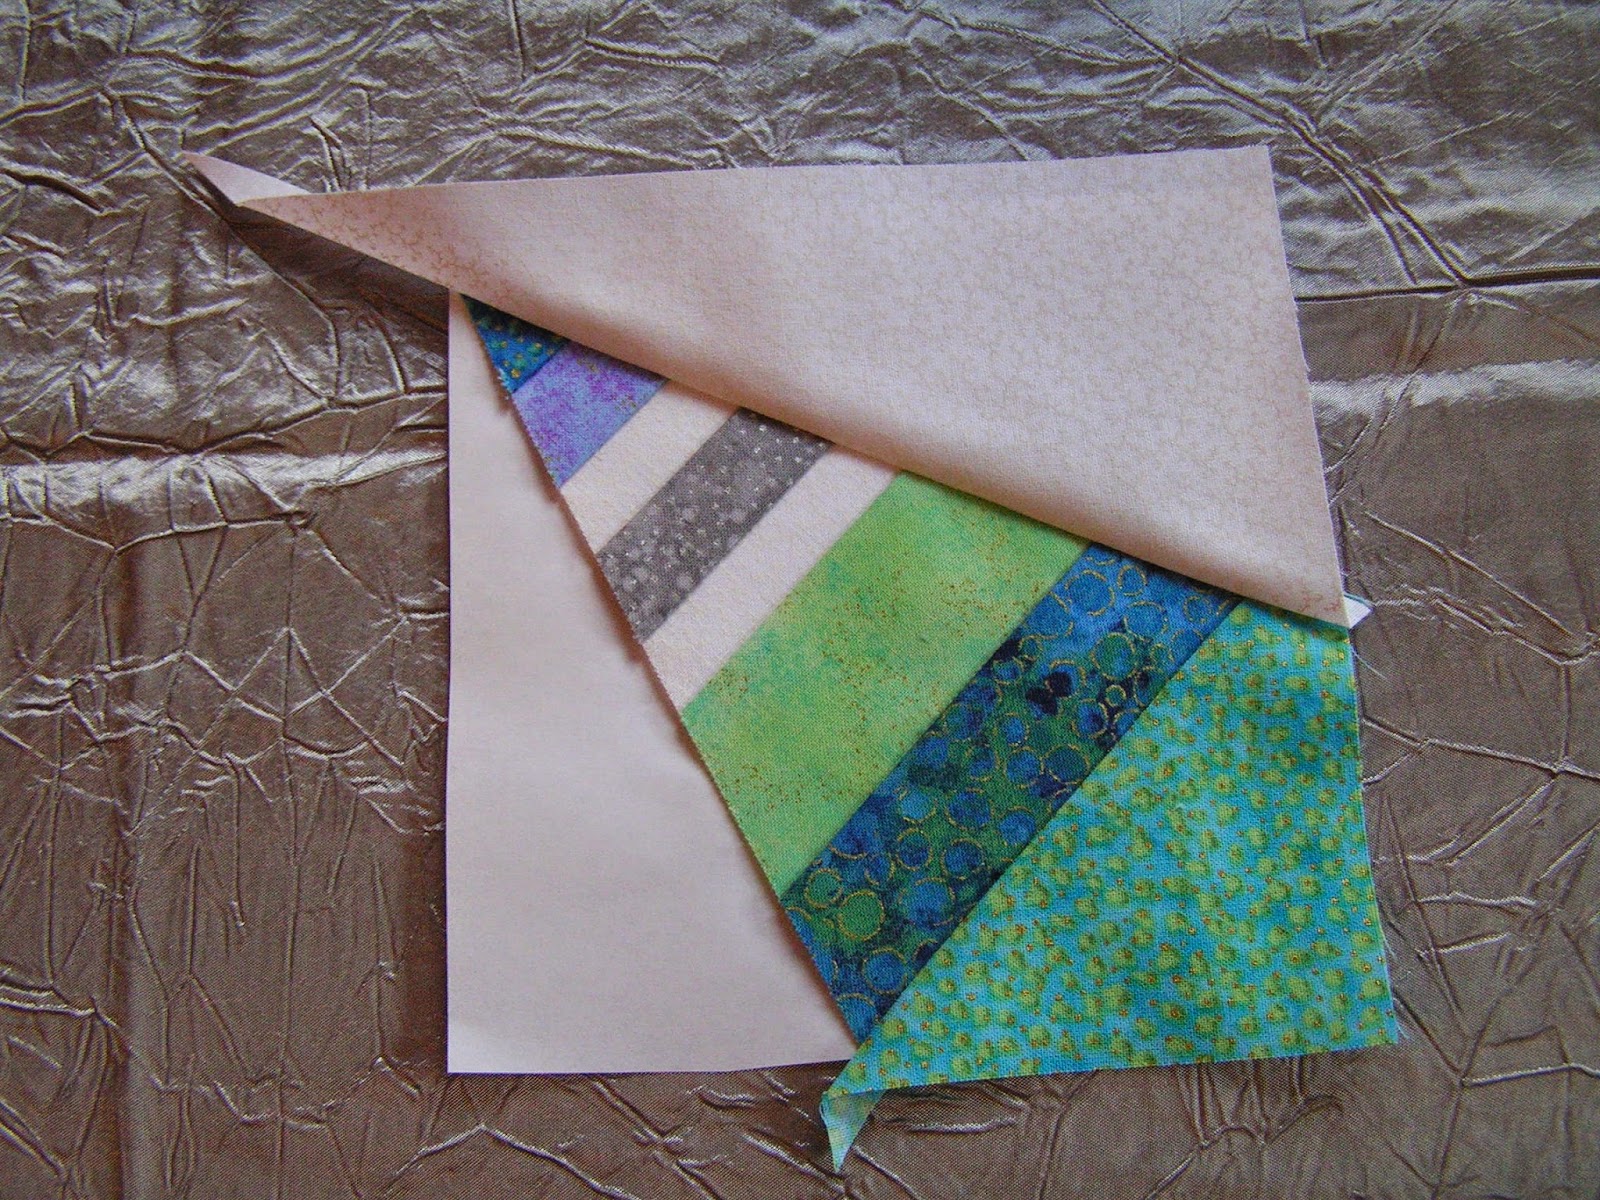
Place a background fabric
triangle in position for sewing (right sides together). While the paper is folded down you can see
the form of the triangle and exactly where it goes.

12. Pin.


22. Join four identical blocks together to form a star block. Make four of them.


Paper Piecing the Blocks - Make 4 star blocks and 1 center block.
The 4 star blocks are paper pieced. The pattern is attached. It is important to align piece #1 the same on
all four identical units the best that you can.
Here are some tips:
1. Score the paper before you begin. I use the back side of a dull seam ripper and
a ruler. Simply place the ruler right on
the sew line of the paper pieced pattern.
Run the back side of the seam ripper along the line next to the ruler
while pressing down slightly. This
creates a crease in the paper for folding the paper. It also makes the paper much easier to take
out when you are done.
2. Fold the paper
down on the bottom line between piece #1 & piece #2.
3. Place the wrong side of fabric touching
the back side of the paper. Center it
the best you can and allow approximately ¼” to show at the bottom. (The scissors are holding the fold down.)
4. Pin in place. Sometimes I use a glue stick instead and iron
it to dry the glue and make it stay.
5.
Place fabric triangle #2
right sides together along the edge of piece #1 that is hanging over ¼”. Center it the best you can.
6. Unfold the paper and stitch right on
the line between piece #1 & piece #2.
I like to keep my stitch length closer than normal. It helps the paper come out if it is
perforated closer.
7. Backstitch – sew from point to point not into the seam allowance
and backstitch on both ends.
9. Fold the paper down where piece #3 is.
10. Trim the fabric hangover to ¼”.
12. Pin.
13.
Unfold the paper and stitch,
backstitching at both ends. Do not sew
into the seam allowance.
14. Press.
15. Fold the paper down where
piece #4 is.
16. Trim the fabric hangover to ¼”.


17.
Place a background fabric
triangle in position for sewing (right sides together). While the paper is folded down you can see
the form of the triangle and exactly where it goes.
18. Pin.
19. Unfold the paper and stitch. SEW INTO THE SEAM ALLOWANCE on this last
seam.
20. Press.
21. Trim the block to size on the outside
lines.
22. Join four identical blocks together to form a star block. Make four of them.
23. Follow the same
paper piecing steps to make the center block.
If you are using two different greys, place same greys in opposite
corners.
Sashing the Star Blocks
If you are using two different grey fat quarters from the
“Mineral” bundle, frame two whole blocks with the same grey and the other two
blocks with the other grey. Place
identical greys kitty corner from each
other in the quilt.
1. Sew a 1 ½” x 10 ½”
sashing strip to one side of each block.
2. Sew a 2” x 10 ½”
sashing strip to the opposite side of each block.
That's it for Month 4. The final quilt assembly instructions will be in next month's tutorial.

1 comment:
coming from sassy. would like to make a mini quilt
Post a Comment