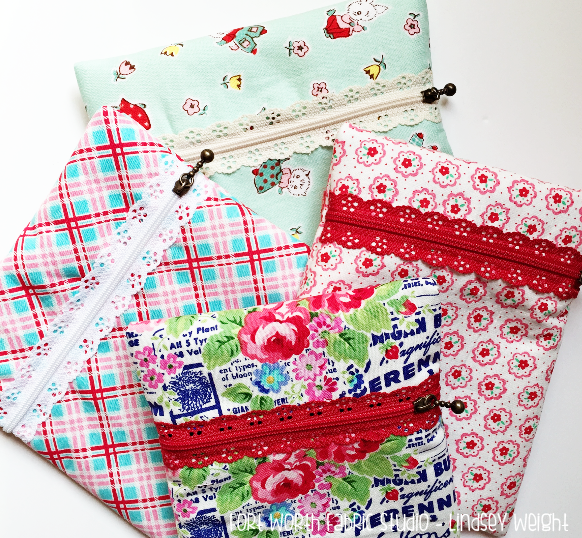
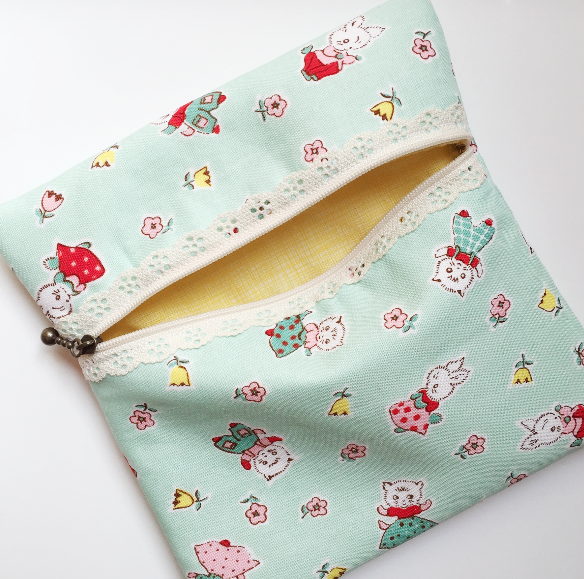
Hi there! I hope you are all enjoying your weekend! Today I have a darling zipper pouch to show you guys! :)
About a week ago, we got in these adorable lace zippers! I could NOT wait to use these beauties!! They are so fun, and make using zippers even easier in my opinion :)
These zippers just add a delicate touch to any zipper pouch. They are easy to use, and come in a variety of colors! You can find the zippers we have in the shop in our notions section right HERE!
I couldn't make just one of these lovelies, I have made four so far, and I am definitely not done! I will be making some boxed pouches next! :)
Alright, let's make one together!
Update: This post has become so popular, I have done some updating. I have added a chart with different size options, these sizes reflect the picture below:
Supplies for a small pouch:
- 7" x 15" piece of Exterior Fabric
- 7" x 15" piece of lining
- 7 " x 15" piece of fusible fleece
- 1 exposed lace zipper (8 inch)
- coordinating thread
Step 1: Line your exterior piece with interfacing, and then sew the exterior and the interior piece together right sides together. Sew along the two short edges, so that you will make a tube.
Step 3: Place the zipper on the exterior side with the zipper pull up. Pin into place and then sew the zipper tape on to one of the short sides. (use coordinating thread so that you won't see your stitches)
Step 4: Now attach the other side of the zipper to the other short end of your fabric. This is going to be kind of tricky. You will want to unzip your zipper so that you can stitch this on. The key is to go slow, and be patient. I also found that using my zipper foot was very helpful in doing this step.
Step 5: Turn inside out, and align your zipper so that it is where you want it to be on the front. I placed mine 2" down. I thought that seemed like a nice spot for the zipper to be on my pouch. Pin along the sides, and then sew the sides shut. Make sure you open your zipper part way, otherwise you won't be able to turn right side out! :) Trim off the excess a 1/4" from the edge, and then do a zig-zag stitch to finish your edges.
Step 6: Turn right side out!
And that's it my friends! You have an adorable zip pouch! These sew up so quickly, you'll make a dozen before you know it! :)


14 comments:
I love how quick and cute these are! I need those zippers :)
Those are adorable zippers! Must get some.
Pretty!! I've got a Craft Gossip post that links to your tutorial here: http://sewing.craftgossip.com/?p=82546
--Anne
very cute. thanks for the tutorial!
Is this missing step 6, or am I just being blind tonight??
Hi Morgan,
I must have just numbered the steps wrong! There aren't any steps missing. :)
So fast and pretty! Thanks for the tutorial!
Thank you, Lindsey. I really appreciate your generosity in putting this online. Just about to try. I adore your choice of fabrics.
Is there a printable version of this tutorial
Thank you. I have a couple of the zippers but really didn't know what to do with them. This is a quick and easy little zipper pouch.
Thank you for sharing this great tutorial. I love lacey zippers, and I love pouches. Guess what next is on my list to make?
Great tutorial but for beginners, it would be good to be consistent in how you refer to things. Like,fusible fleece in the list of requirements but interfacing in the instructions. Also some inconsistency with the words "lining" and "interior". I have some of these zips so Im off to make some bags now :)
Can't wait to try one of these! I happened to find a lace zipper at one of my local craft stores but it is 14 inches long - can I trim it like a regular zipper?
Post a Comment