
We are excited to have Cristina from Pretty Little Quilts stop by today and share this fun block tutorial for Christmas in July! Be sure to stop by Cristina's blog and check out all of her lovely quilts!

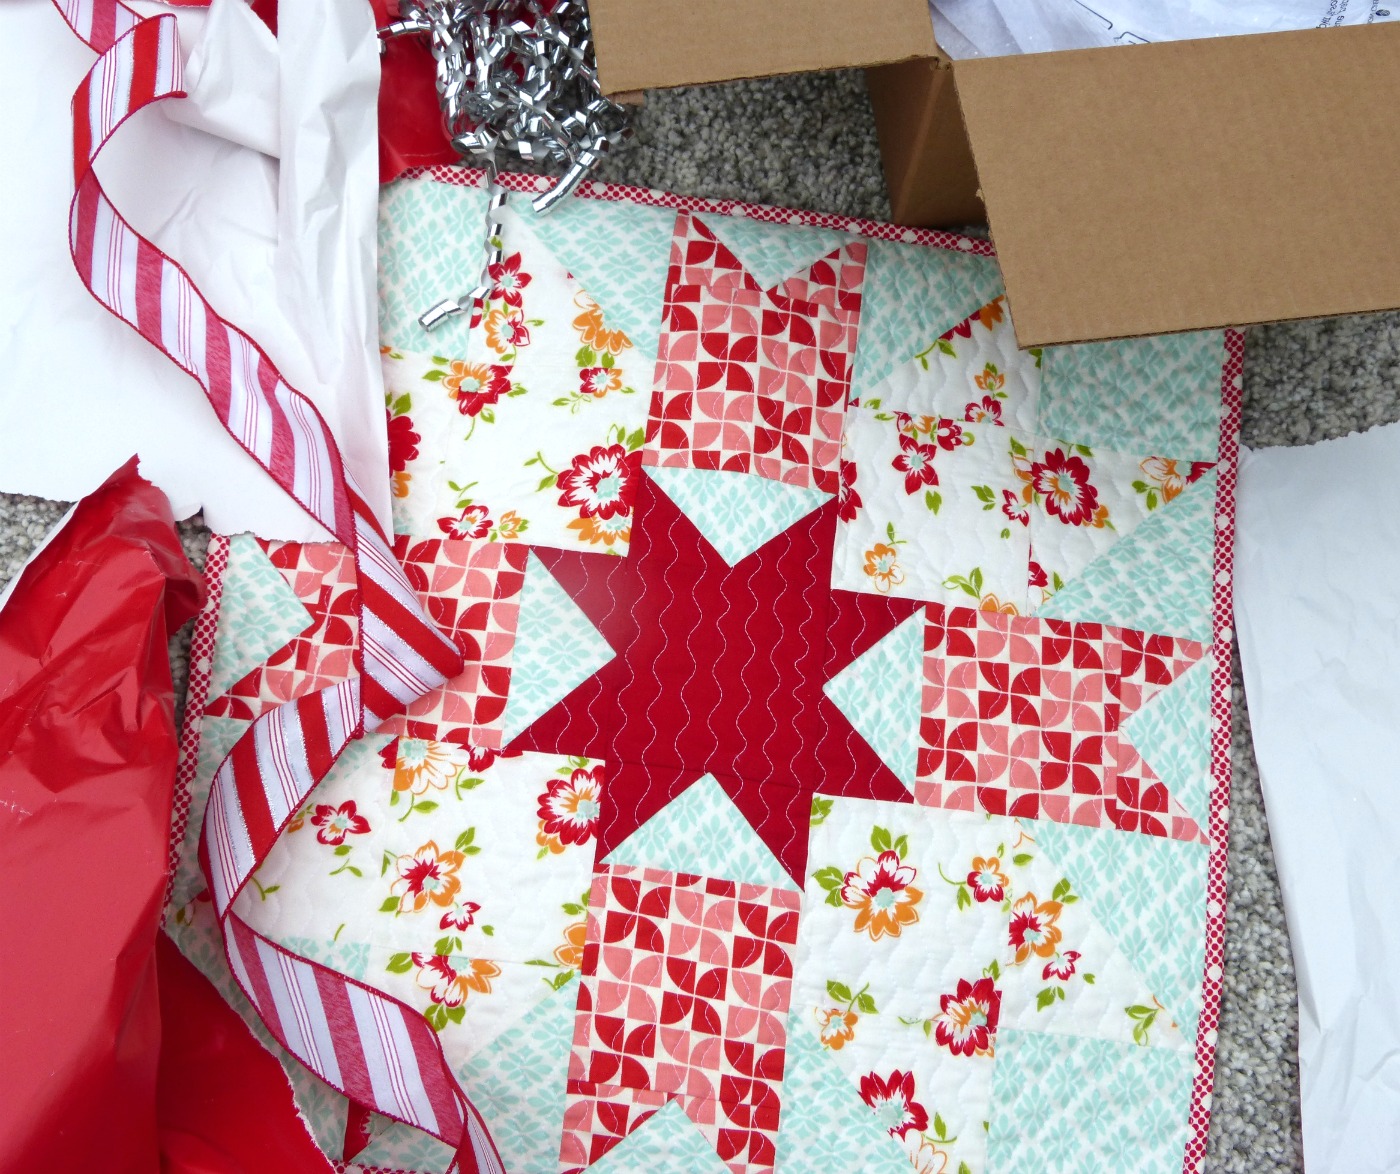
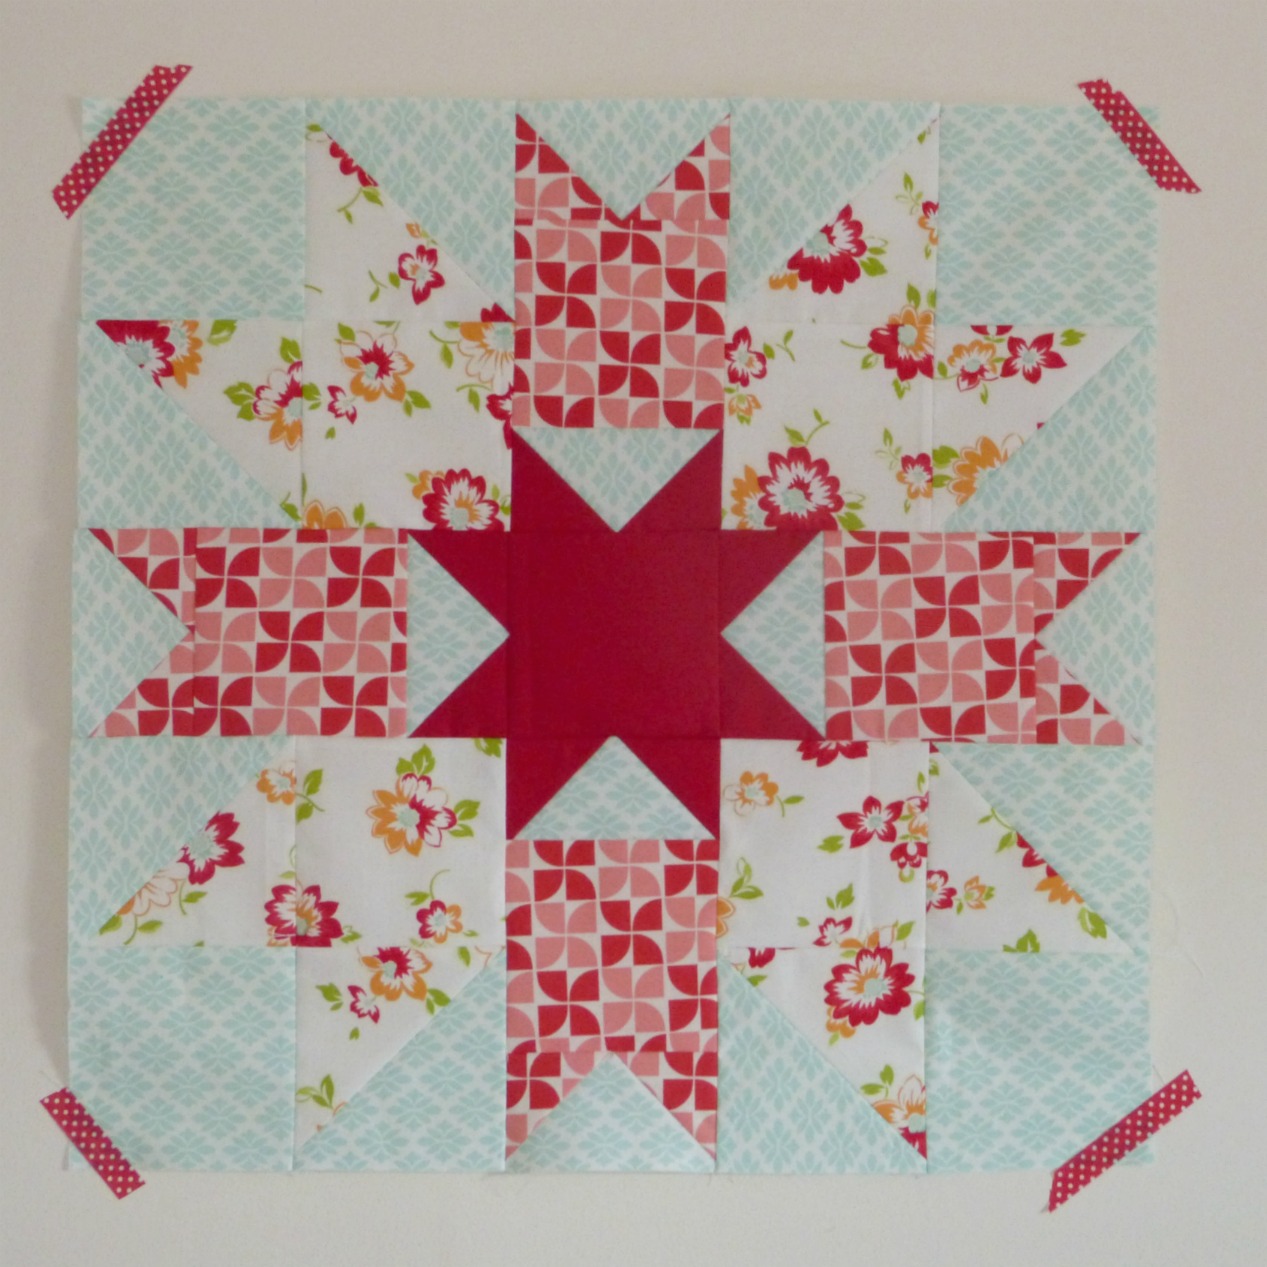
Hi everyone. My name is Cristina Tepsick, I'm a mother of 3, and an active duty member of the U.S. Air Force. I'm a Texan by birth, but I'm currently stationed in England. In my free time I love quilting and I blog over at Pretty Little Quilts. I'm very excited to be part of Fort Worth Fabric Studio's Christmas in July series, and today I'm going to be showing you how to make a Boxing Day block. This block finishes at 20" so you can make a cushion or mini quilt from it. The block (surprisingly) was named by my husband. That in itself is a Christmas in July miracle, because he normally has no idea what's going on when it comes to quilting!! When I was making the block, I tried to create something that looked like a present with ribbons all over it, and my husband said it reminded him of Boxing Day--the day after Christmas. Before I moved to England, I thought the day originally had something to do with watching boxing matches on TV, but then I learned that traditionally it was the day that servants received gifts or "Christmas boxes" from their employers. But now, though, it's generally thought to be called"Boxing Day" because of all the boxes from the explosion of unwrapped Christmas gifts.
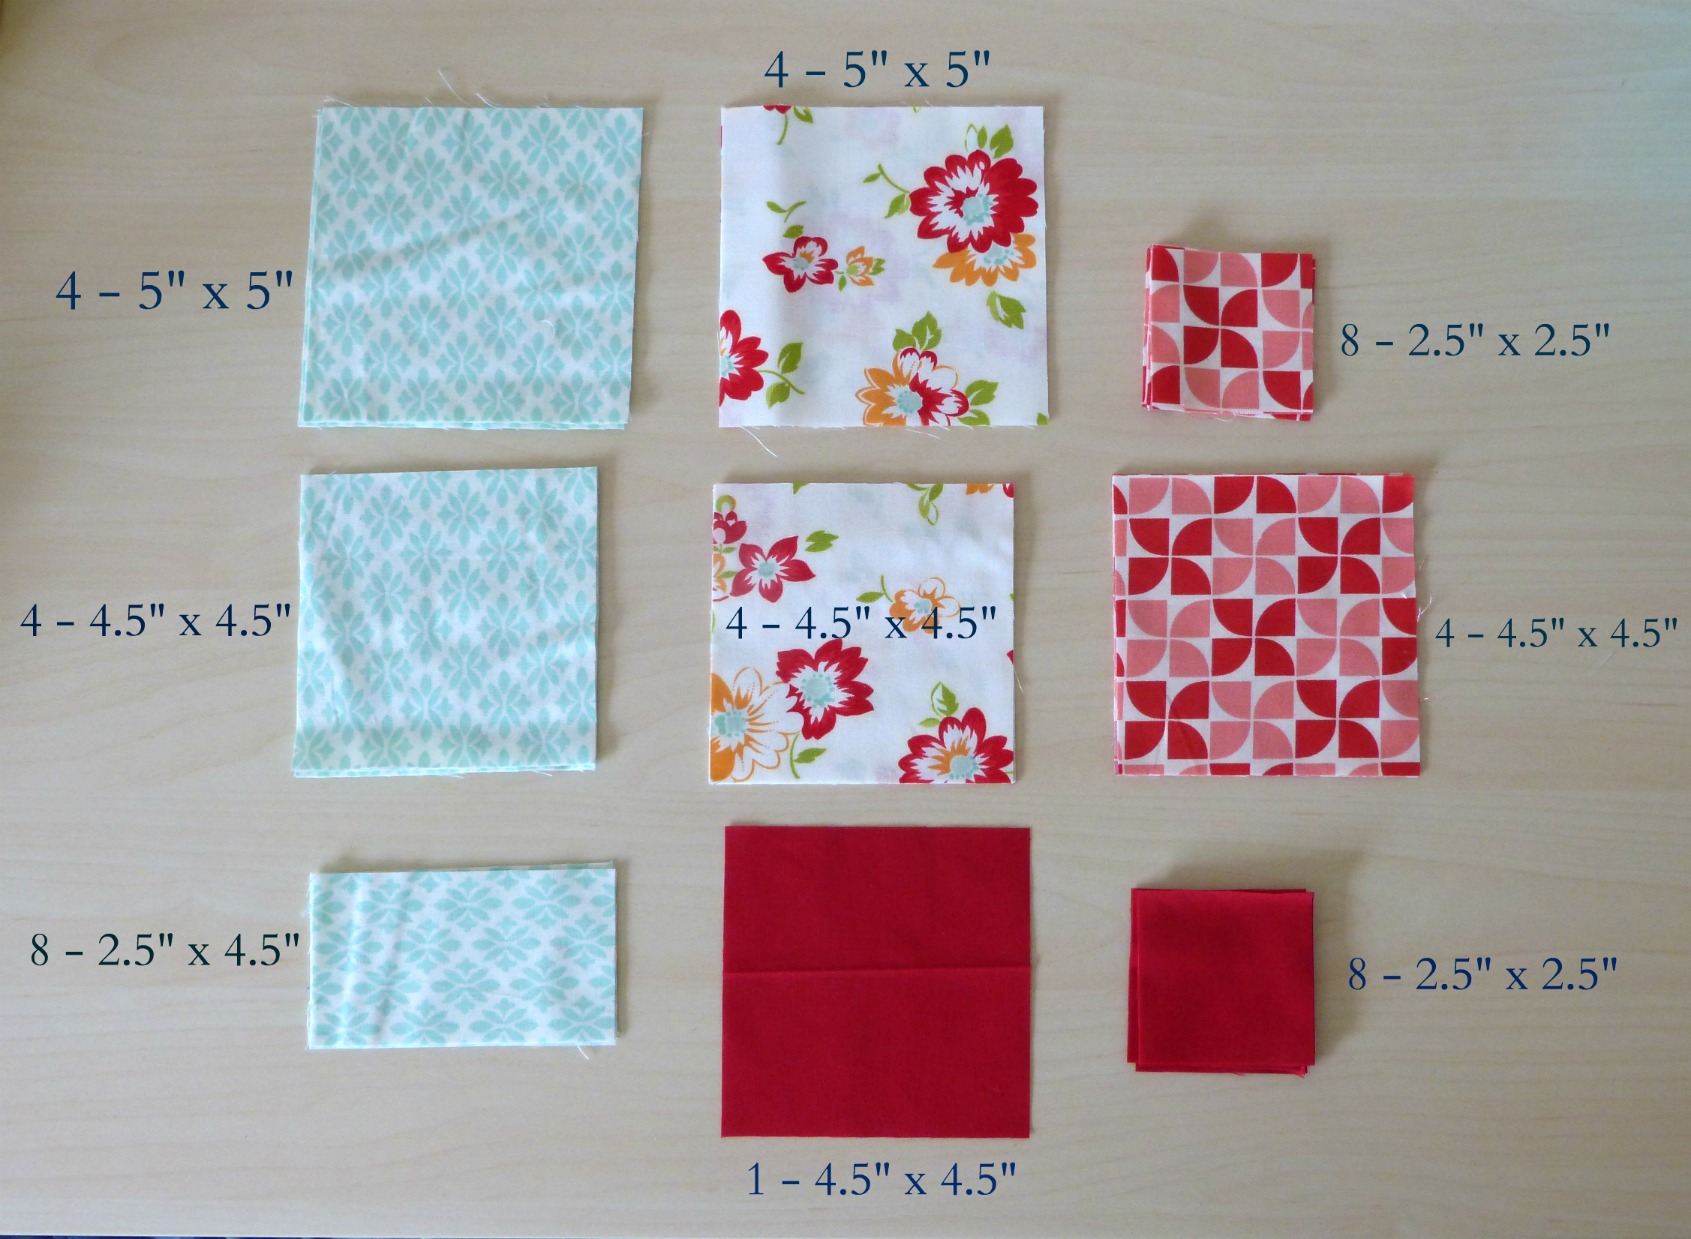
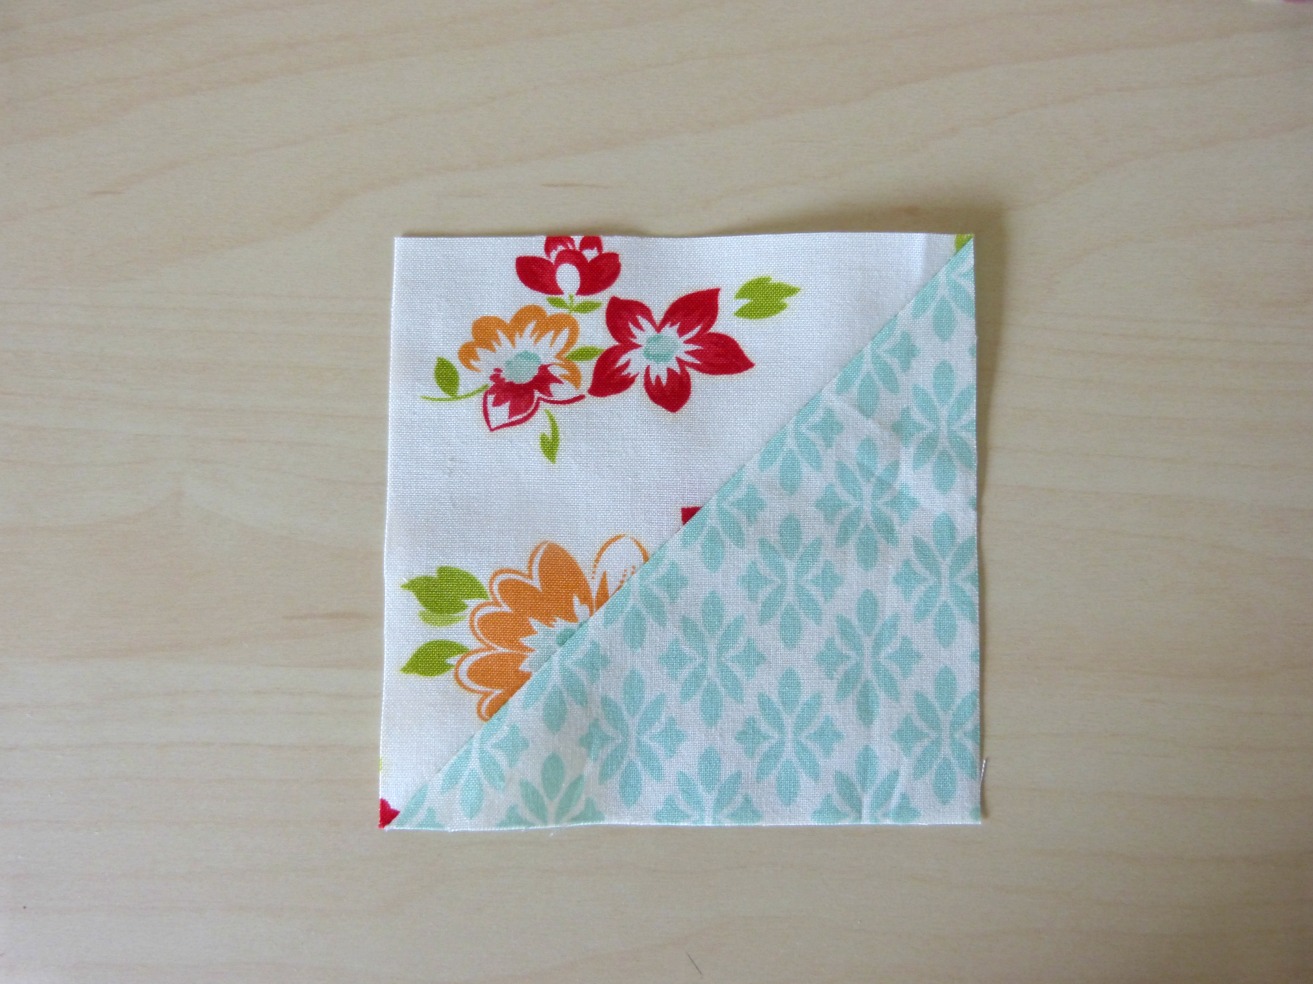
So, to get started with the block, this is what you'll need:
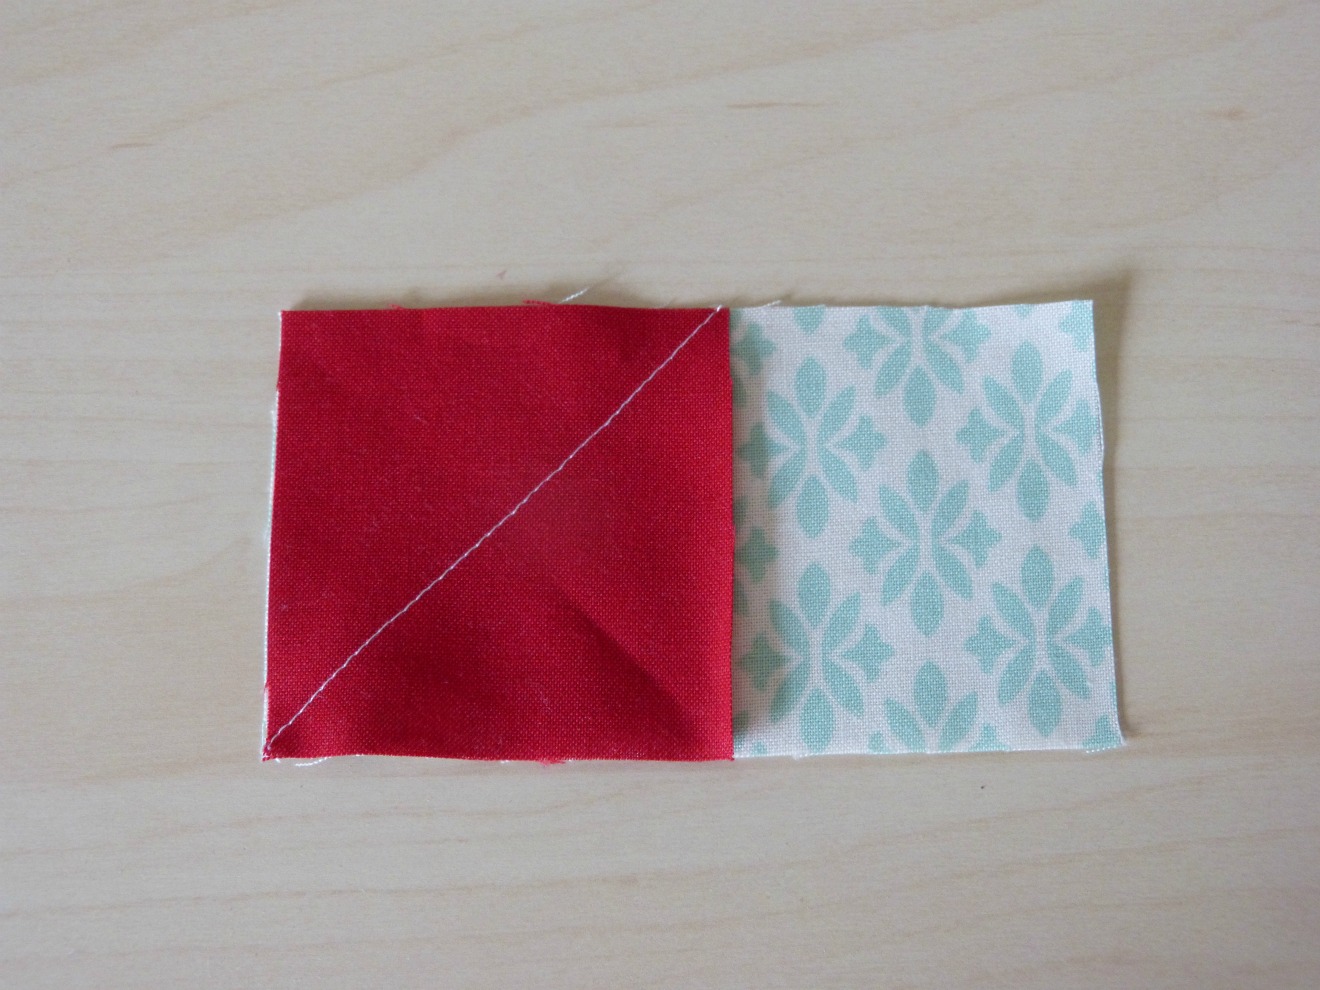
 First, we're going to make some half-square triangles. Take your 5" x 5" floral squares and draw a line down diagonally down the center of the back of each. Next, place the floral square RST with the 5" x 5" aqua square and sew 1/4" seam on each side of the drawn line.
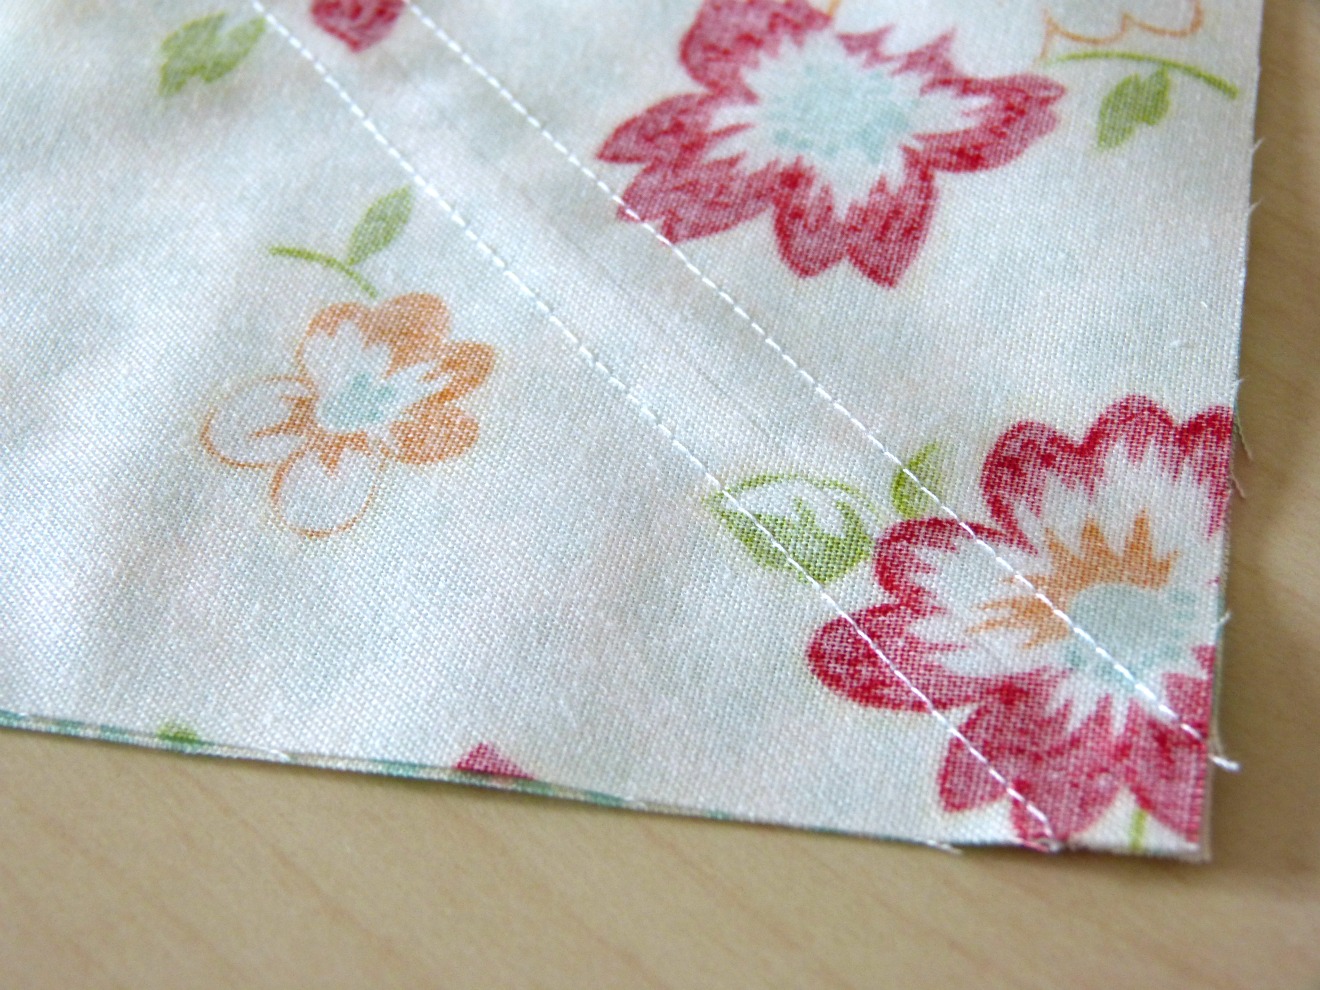 Next, cut along the drawn line to separate and press open.
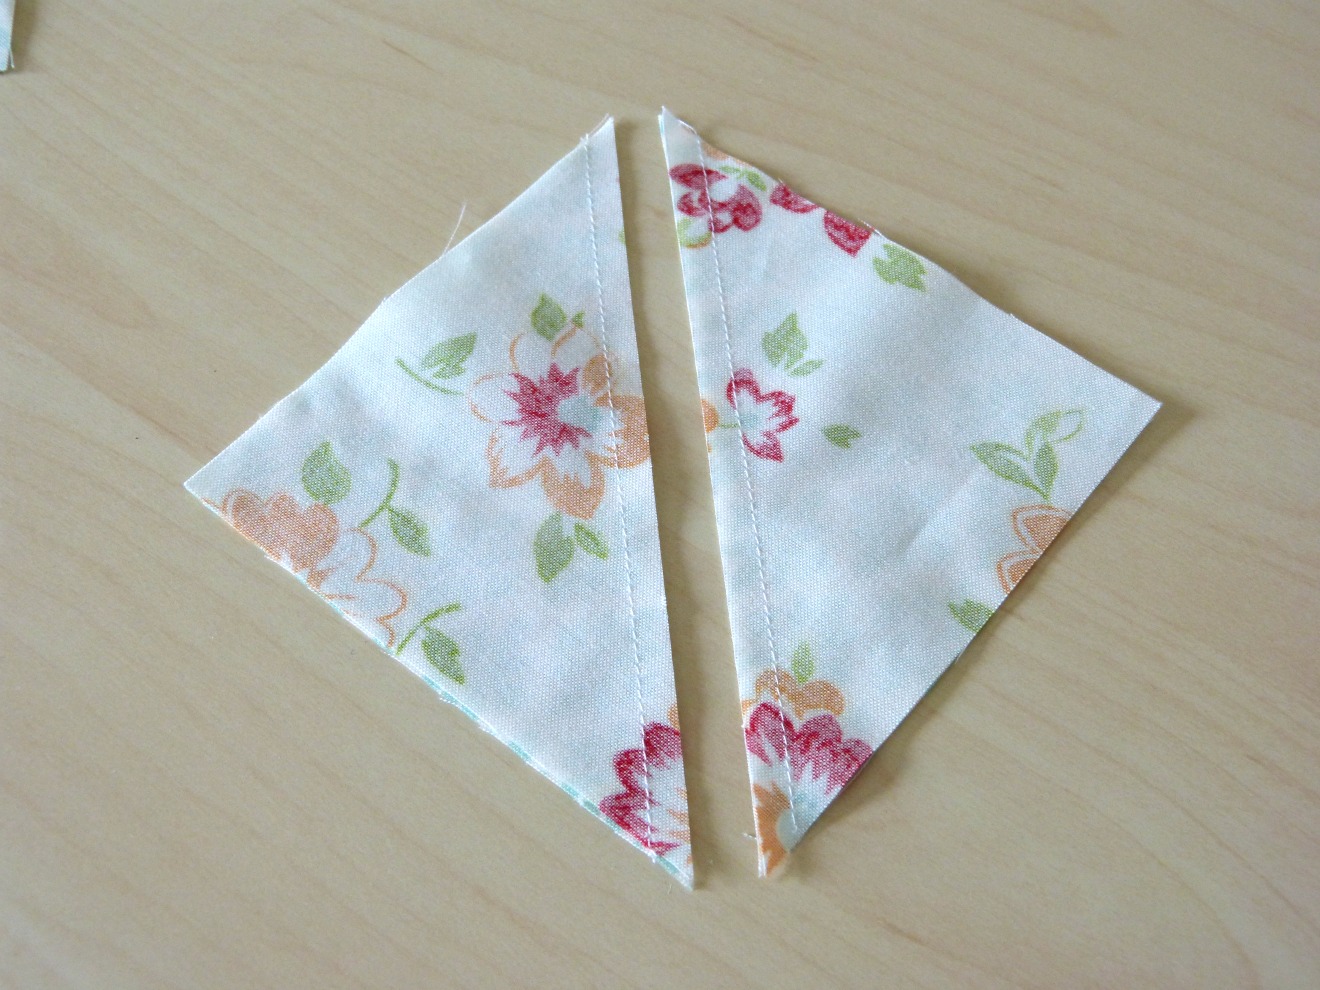
 And now, just square to 4.5" square. Repeat 3 times to make 8 HSTs.
Now, take 2 HSTs, a 4.5" floral square, and a an 4.5" aqua square and sew together as shown to create 4 corner units.
And now, just square to 4.5" square. Repeat 3 times to make 8 HSTs.
Now, take 2 HSTs, a 4.5" floral square, and a an 4.5" aqua square and sew together as shown to create 4 corner units.
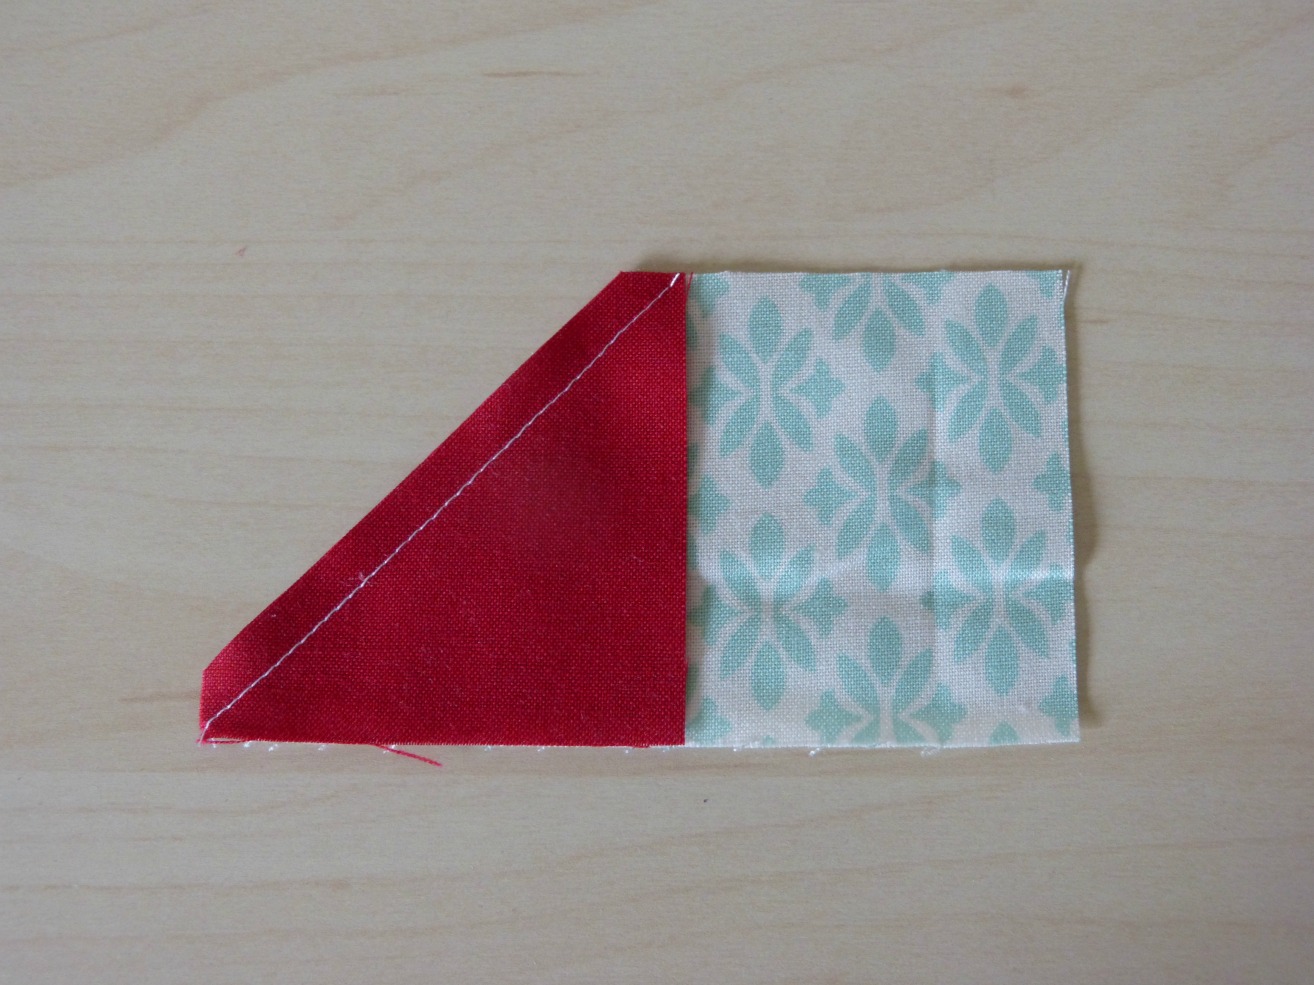
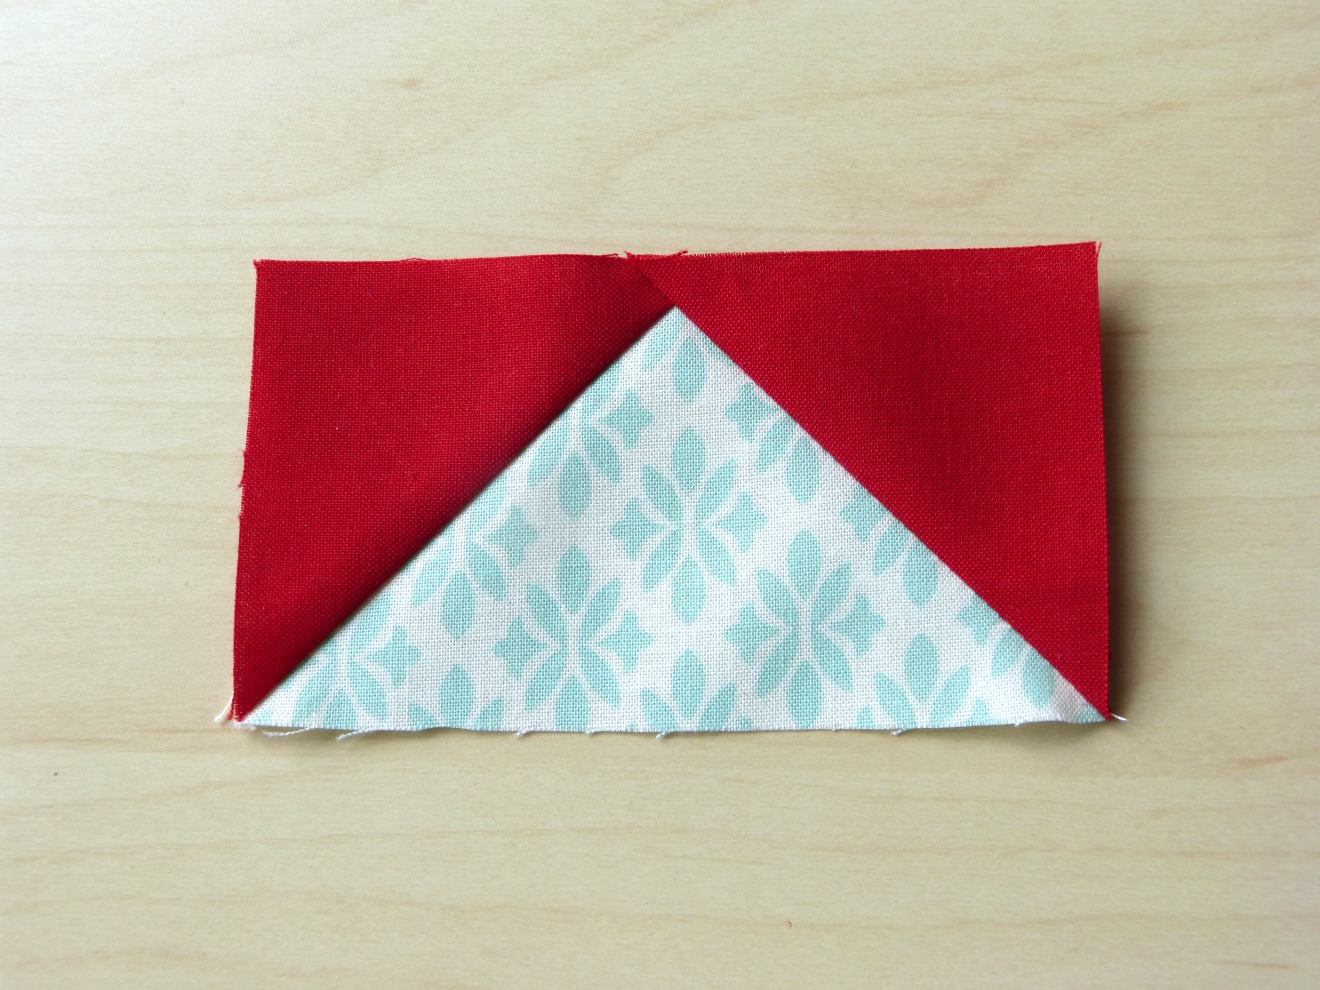
 Next, we'll make our center units. For this you are going to be making some flying geese. To make 1 flying geese, first take a 2.5" x 4.5" aqua rectangle, and place a 2.5" red square on the corner. Sew a diagonal line down the center of the red square as shown.
 Then, trim the square 1/4" from the outside of the seam. Press towards corner.
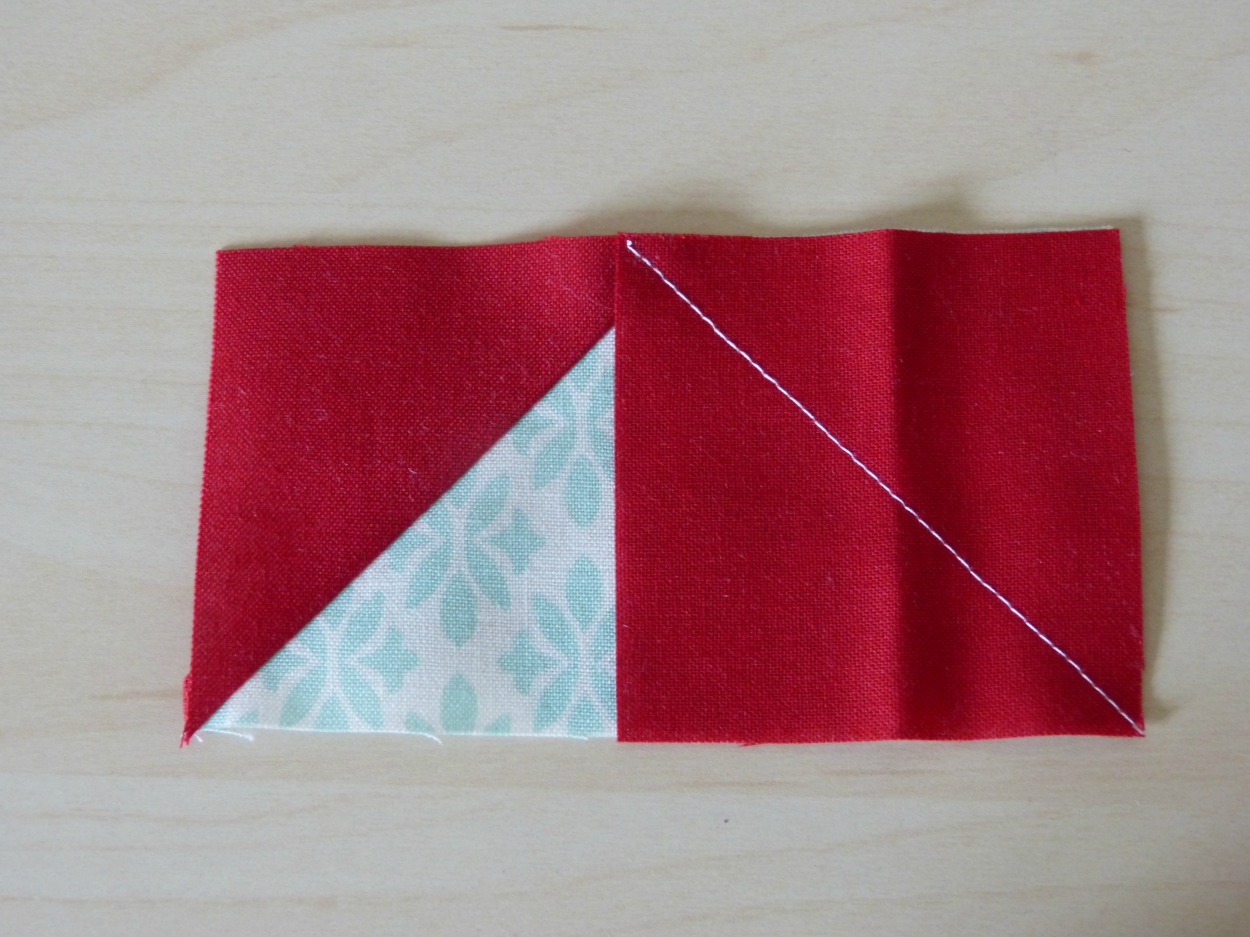
 Place a second 2.5" red square on the opposite corner of the aqua rectangle and repeat.
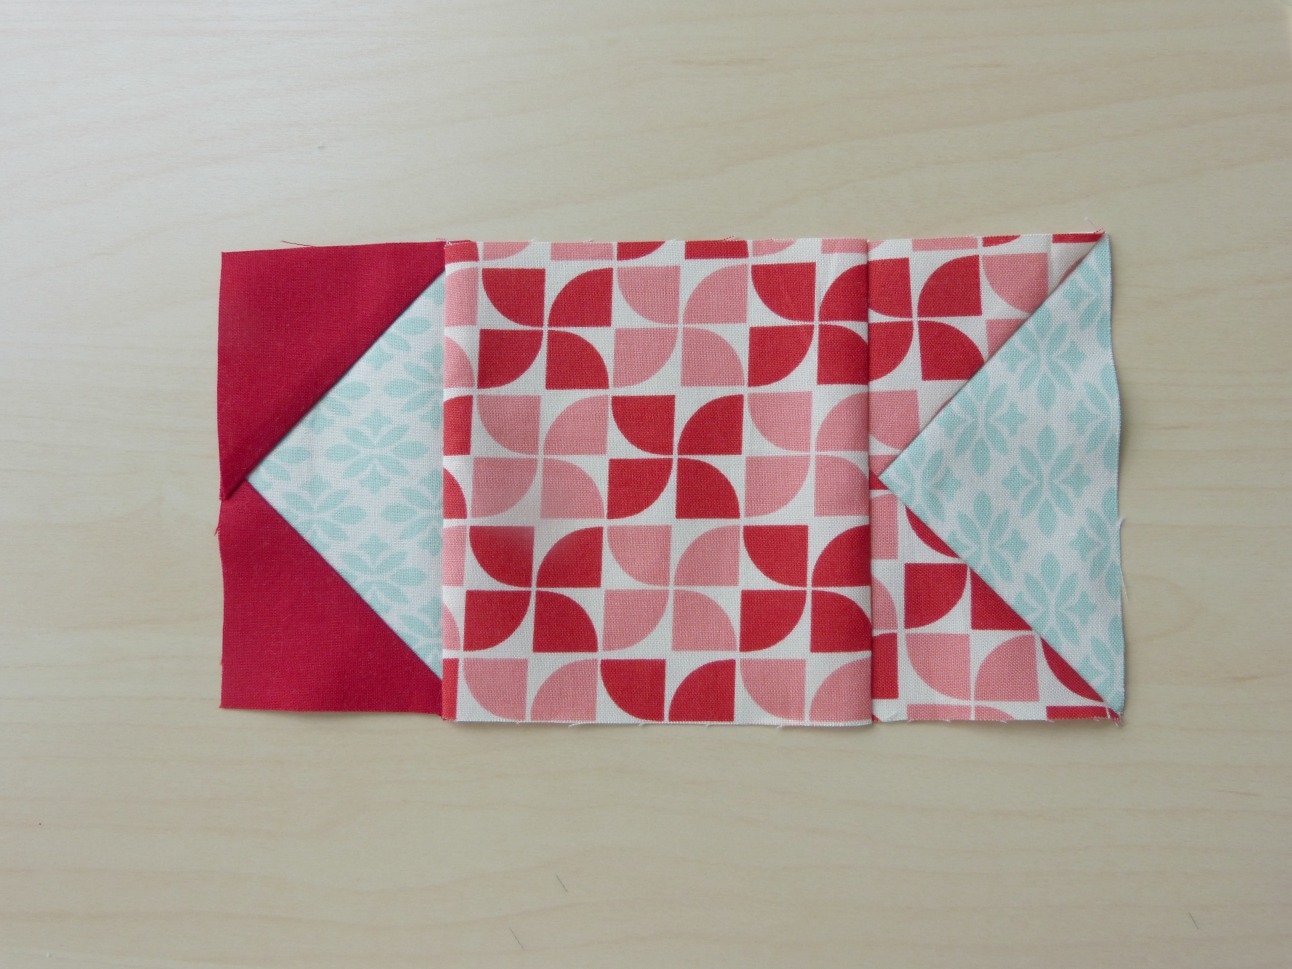
 Repeat steps to make a total of 4 red/aqua flying geese. Then, make 4 more flying geese using your remaining aqua 2.5" x 4.5" rectangles and the 2.5" pink/red squares.
To assemble the center units, sew a red/aqua flying geese to a 4.5" red/pink square. Sew a red/pink flying geese to the opposite side. I pressed my seams toward the center square, because it was less bulky. Create 4 center units.
Repeat steps to make a total of 4 red/aqua flying geese. Then, make 4 more flying geese using your remaining aqua 2.5" x 4.5" rectangles and the 2.5" pink/red squares.
To assemble the center units, sew a red/aqua flying geese to a 4.5" red/pink square. Sew a red/pink flying geese to the opposite side. I pressed my seams toward the center square, because it was less bulky. Create 4 center units.
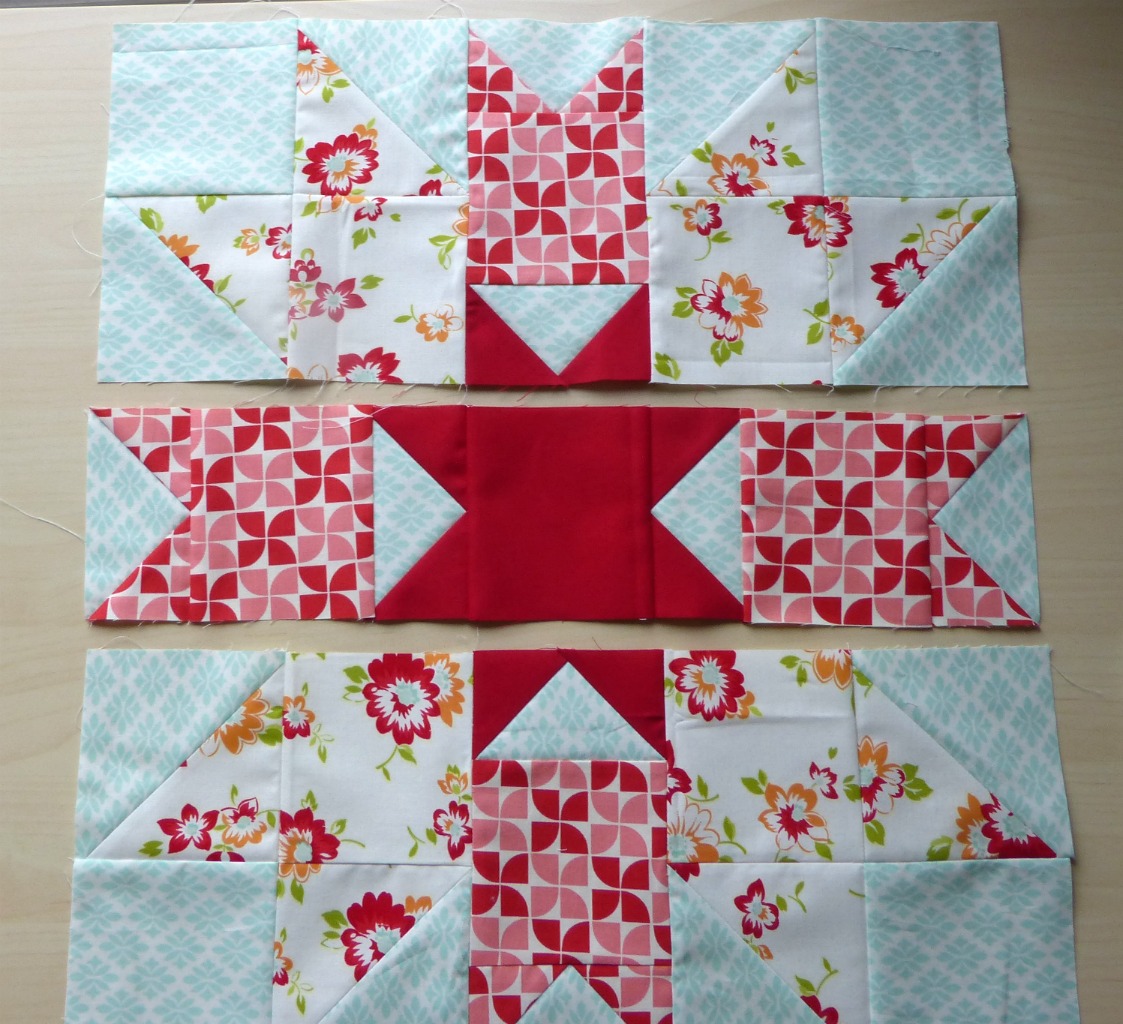
 Now you just need to assemble your block as shown below, with the 4.5" red square in the center.
 Now, just square it to 20.5", press it, and you're done!
 Thank you for joining me, and I hope you enjoyed this tutorial!!!
XOXO Cristina

9 comments:
Oh! Gorgeous block! Thank you Cristina!
A beautiful block! :)
great job! I especially like the fabrics you used.
Beautiful as always Cristina! So fun that your husband named this one!
What a beautiful quilt block. Thank you.
So pretty! Love your color combinations!
I envy you. We were stationed at RAF Mildenhall years ago - great duty for a USN officer. Best 3 years of our military life. Love the quilt. I think I will make it to remember about boxing day. Enjoy your tour. We live in VA Bch now - good quilting here
That is so pretty. Thanks for the tutorial.
Nice tutorial! Usually people get too wordy, but your was perfect. Clearly stated. It is not easy to write instructions. I have had to do it several times and after reading my work wondered what I was thinking! Great job. I am a quilter and will make one tomorrow. Thanks.
Post a Comment