Showing posts with label Tutorials. Show all posts

Wednesday, October 1, 2014

Milk Cow Kitchen Table Topper


Hi there, and Happy October!  October has to be one of my favorite months out of the year.  I love the crisp fall weather, and I love the autumn colors! I happen to love decorating for Halloween, and I just love Halloween in general, so I am in my happy place right now! 

I have also officially started to get into the baking spirit! I just whipped up a batch of cinnamon rolls yesterday, and they were so delicious! The family gobbled those things up within a day! (I may or may not have had a more than a few myself)  


So let's get to another Milk Cow Kitchen project, shall we?


This fun little topper, is so simple to put together! It is made using charm squares, and comes together quickly.  I can't say enough about this Milk Cow Kitchen fabric! I love the entire line, and what better way to showcase an entire line of fabric, then using charm squares?  There are so many lovely prints in there, it was hard to just choose 24 to use in my topper!

For the backing I used this awesome patchwork print! This topper could actually be "reversible" because the baking alone, is so darn cute!


For the quilting, I just used a pre-set stitch on my machine, and kept it very simple.  I also decided to machine bind this one--mostly because my binding fairy wasn't around. ;)   But I wanted to try a zig-zag stitch to do the binding to see how I liked it.  I actually didn't mind it at all, and will definitely use in the future.


Alright, let's get started!

Tuesday, September 30, 2014

Milk Cow Kitchen Tote

Hi there!  I want to thank you all for your kind comments about the apron I shared yesterday! Today I am going to show you another project featuring the Milk Cow Kitchen fabric.  When I saw this patchwork fabric, I knew I had to make it into a tote.  I have always wanted to make a patchwork tote, but I didn't really want to actually do the patchwork!  So this lovely print, has done all the work for me! 


 This bag is a great market tote! Perfect to take to your local farmers market and place all your purchases in this roomy tote!  


This is as simple as it gets when sewing a basic tote.  It comes together quickly, and is perfect for a beginner!  I decided to dress my tote up a tad, I added a fun little gathered pocket.  I thought this pocket would be perfect to place your keys, or phone so you don't have to go digging for it in the huge interior!  If you don't want to add the pocket, it would be just as lovely, and it will come together even faster! 


So what do ya say, let's make this tote! 

Monday, July 28, 2014

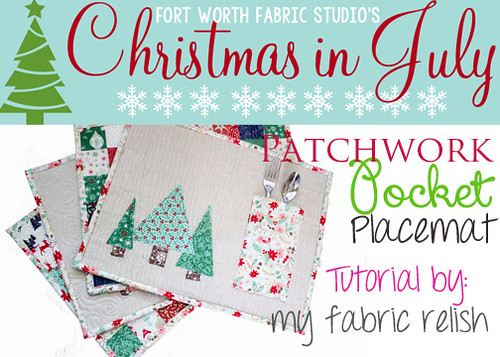
Patchwork Pocket Placemat Tutorial

Today we have guest blogger, Melissa from My Fabric Relish! She is sharing this darling placemat tutorial for Christmas in July.  This is such a fun idea, and perfect to add a little holiday flare to your Christmas table!  Be sure to stop by Melissa's blog to see all her lovely work! :) 


Howdy y'all! This is Melissa over from my fabric relish and so excited to share something that has been on my Christmas sewing to-do list forever! Right now is the best time to start your Christmas projects, because usually July is when all the yummy Christmas fabric starts hitting the shelves and we all know that once we get into October, time starts going warp speed!


Monday, April 21, 2014

Daffodil Days Throw Pillow Tutorial

Hi there! We have a treat for you today! Sarah, from Berry Barn Designs is guest posting today and has come up with this darling throw pillow to show you guys.  If you have wanted to learn to sew curves, but have been hesitant to try, I think this tutorial is a great opportunity to get you started!

Daffodil Days {Throw Pillow Tutorial} designed by Sarah Nunes for Fort Worth Fabric Studio


Sarah Nunes {Berry Barn Designs}Welcome! My name is Sarah, and I'm a milspouse and work-at-home mom who loves sewing and quilting, sharing whatever craftiness I’ve been up to on my blog, Berry Barn Designs. I enjoy carving out time for large quilts, but with two preschoolers underfoot, gravitate toward quick projects, ranging from doll quilts to home decor to clothes - you can see a variety of my projects here. Today I’m excited to share my very first ever guest post with all of FWFS's readers – an easy tutorial for making my “Daffodil Days” throw pillow. If you’re new to curved piecing, this is a great starter project. The blocks are quite forgiving and you’ll have this cute pillow whipped up in no time!

Monday, April 14, 2014

3 Projects Featuring Moda Toweling!

I have recently discovered Moda Toweling, and I seriously can't get enough of it!  If you aren't sure what toweling is or have never heard of it, then you've come to the right place! I am going to show you what it is, and also show you three different ideas using this toweling!


Moda Toweling, is an affordable cotton fabric that is purchased by the yard.  It is 16" wide, and is hemmed on both sides.  It comes on a roll, kind of like a paper towel roll and it is cut by the yard.  So all you have to do is hem the top and bottom of your towel.  It also comes in a variety of types.  

               1. Natural                    2. White                   3. Red/Blue Border


I have used both the white and the natural in these projects, and couldn't be happier with them! 

For these tea towels, I used the natural toweling.  The towels measure 16" x 25" finished.  I also made a free pattern for download, so you can make these yourself!  You can download here!

Jodie has made these sweet towels into affordable kits so that you can make your very own! Each kit contains enough fabric to make two towels! You can buy the kits here!


You can enter to win a kit for these towels here! And you can download the PDF pattern for FREE! 


For the apron, I used the same method I used to make the towel, except I did 6 prairie points, and I sewed the prairie points on the long edge rather than the shorter edge.  I also added a grosgrain ribbon for the ties, rather than fabric! This was such a fun project and took less than an hour to make! 


For the apron I used:
5. 7/8" red grosgrain ribbon (2.5-3 yards)


I wanted to also show you a project with the white toweling! 

I decided that my little girl needed a fun little apron! I thought ruffles would be the perfect addition to the apron!


4. 7/8" red grosgrain ribbon 

If you know how to sew a ruffle, then you can make this apron! All I did was make 4 ruffles by using the width of fabric strips and sewed them onto the toweling.  I then sewed a strip of red ribbon above the ruffles to cover my seam.  I used another red ribbon on the for the ties.  

The sky is the limit here with this little apron, you could add a fun little pocket or even add some appliqué!


I have had so much fun creating these projects with the toweling! I have stocked up on both the natural and the white toweling for future projects! If you decide to make an apron or some towels, I would love to see them! Shoot me an email: lindsey@fortworthfabricstudio.com

Talk to you soon,


Making Monday Marvelous  Masterpiece Monday  Design Wall Monday by Patchwork Times  Blossom Heart Quilts*Show and Tell Tuesday by Fresh Squeezed FabricsTuesday by Free Motion by the River *Fabric Tuesday by A Quilt Story  *Mandy's Recipe Box Tuesday *Time To Sparkle *Wow Me Wednesday at Polkadots on Parade Whimsy Wednesday at The NY Melrose Family *Wip Wednesday at Freshly Pieced Sew Fresh Quilts  Let's Bee Social Wow Us Wednesday at Savvy Southern Cottage *We Did It Wednesday! at Sew Much Ado Needle and Thread Thursday by My Quilt Infatuation *Really Random Thursday by Live a Colorful Life Thursday Threads by 627Handworks * I Quilt by Pretty BobbinsLink Party Palooza at Today's Creative Blog

Wednesday, March 12, 2014

Fabric Flower Tutorial


Hi there!  So, I have had this lovely penny-wise fabric and I thought it would be perfect to make some fun fabric flowers with it! I searched high and low for different ways to make fabric flowers, and finally decided to come up with my own way to make these little lovelies!  I decided on the gray and green color combo because I thought it would be fun to have my little girl wear it for St. Patrick's Day.  But you could definitely make this in any color combination you prefer and it would look just as lovely! 
This flower measures about 3.5" across.

Tuesday, March 4, 2014

Lucky Shamrock Pillow {Tutorial}

Hi there! It's hard to believe we are already in March! I thought it would be fun to share with you this simple and easy pillow for St. Patrick's Day.  


Tuesday, February 11, 2014

How To Make A Quilt {Part 3} Cutting Your Fabric

Welcome back to How To Make A Quilt!


You can find parts 1 and 2 below:

Part 1 --Supplies
Part 2 --Fabric Requirements and Design

Are you ready to cut some fabric?  Cutting your fabric may seem a bit intimidating, but once you get comfortable with it--it will be snap!

Tuesday, January 28, 2014

Hidden Star Quilt {Free Pattern}


Hi there! I have finally completed the red/aqua quilt, and am ready to show you the tutorial on how to make this quilt top! :) 

I have decided to name this quilt "Hidden Star" because if you look closely, you can see the white stars come out in the secondary pattern.  :) 


Thursday, January 16, 2014

How To Make a Pillow Cover

Hi there! Okay, I wasn't sure that I was going to get this post up today--I woke up yesterday and was really sick! Turns out I most likely have the flu!  Boo!! I have never had the flu, and I can now say that I would not wish this on anyone! It is terrible! I will definitely be getting a flu shot next year.  :) 

So, now that I had my little pity party! :)  I am going to show you how to turn your heart block into a pillow cover.  


Wednesday, January 15, 2014

Heart Block Tutorial

Hi there! Hope you all are doing well!  If you haven't entered to win this week's current giveaway ($50.00 Gift Certificate to Fort Worth Fabric Studio) --you still have time to enter! Go here for all the details.  

Love squared is one of the newest bundles from the shop, and I can't tell you how much fun I have had with this bundle of fabric.  I have made three different projects, and I still have some left over scraps!  (you can buy the bundle here)


Related Posts Plugin for WordPress, Blogger...